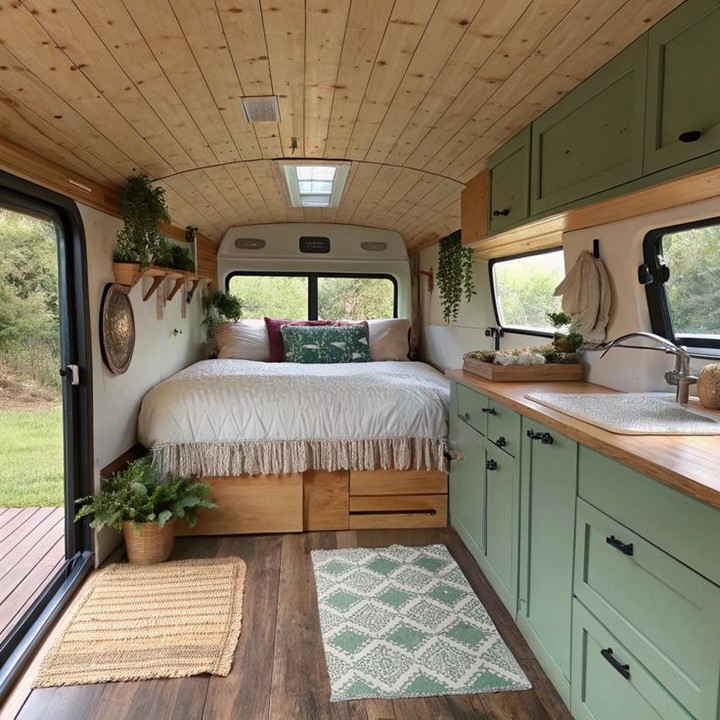
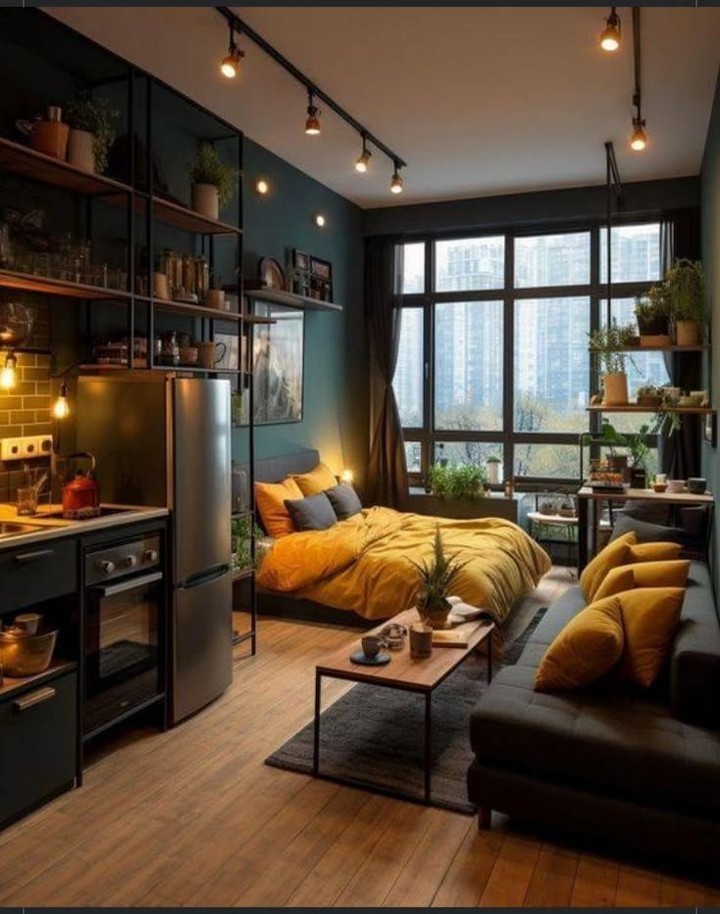
Living in a studio apartment presents unique design challenges that can actually spark incredible creativity. When every square foot counts, thoughtful decor choices become essential rather than optional. The beauty of studio living lies in this constraint it forces us to be intentional about what we bring into our homes and how we arrange our spaces.
Whether you’ve just signed a lease on your first studio or you’re looking to refresh your longtime small space, this comprehensive guide offers 42 innovative decor ideas that maximize functionality without sacrificing style. From clever room dividers to multi-purpose furniture and visual tricks that make your space feel larger, these solutions will transform your compact living area into a stylish sanctuary that feels surprisingly spacious.
1. Room Divider Bookshelf
Create separate “rooms” within your studio using a bookshelf as a divider. Open shelving units work particularly well because they maintain visual flow while still defining distinct areas. Position a bookcase perpendicular to a wall to separate your sleeping area from your living space, filling it with books, plants, and decorative objects that look attractive from both sides.
Unlike solid walls, bookshelf dividers provide valuable storage while allowing light to filter through, preventing any area from feeling closed off or dark. Opt for a unit that’s tall enough to create definition but not so imposing that it makes your ceiling feel lower.
2. Curtain Partitions
For a softer approach to zone definition, install ceiling tracks that allow you to draw curtains when you want privacy and open them when you prefer an open-concept feel. Lightweight, semi-sheer fabrics work wonderfully as they filter light while still providing separation.
This flexible solution is particularly valuable when entertaining guests, as you can quickly conceal your bed area without committing to a permanent division of your space. Choose fabrics that complement your overall color scheme for a cohesive look.
3. Strategic Rug Placement
Define your living area with a well-placed area rug that visually separates it from your sleeping or dining space. This zero-footprint solution creates psychological boundaries through visual cues rather than physical barriers.
Select a rug that’s appropriately sized for your “living room” furniture arrangement, ensuring all front legs of furniture sit on the rug. This creates a cohesive conversation area that feels distinct from the rest of your studio.
4. Back-to-Back Sofa and Bed Arrangement
Position your sofa with its back facing your bed to create a natural division. This arrangement establishes a clear boundary between living and sleeping zones without requiring any additional furniture or features.
For maximum effect, choose a sofa with a structured back of consistent height. Consider adding a slim console table behind the sofa to create additional surface space and further enhance the division.
5. Sliding Barn Door or Panel System
For a more substantial division that doesn’t sacrifice precious floor space, install a sliding door or panel system. Unlike swinging doors that require clearance, sliding options move parallel to the wall, making them ideal for tight spaces.
Modern interpretations include frosted glass panels that maintain light flow while creating privacy, or canvas panels that can double as artistic focal points. When fully open, these systems tuck neatly against the wall, allowing you to enjoy an open-concept feel when desired.
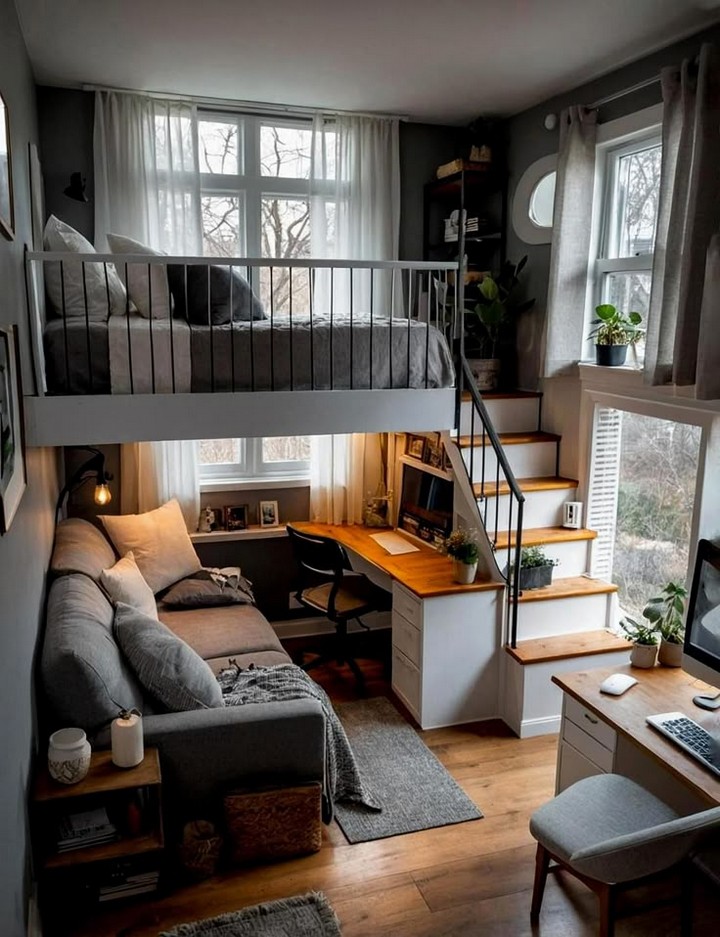
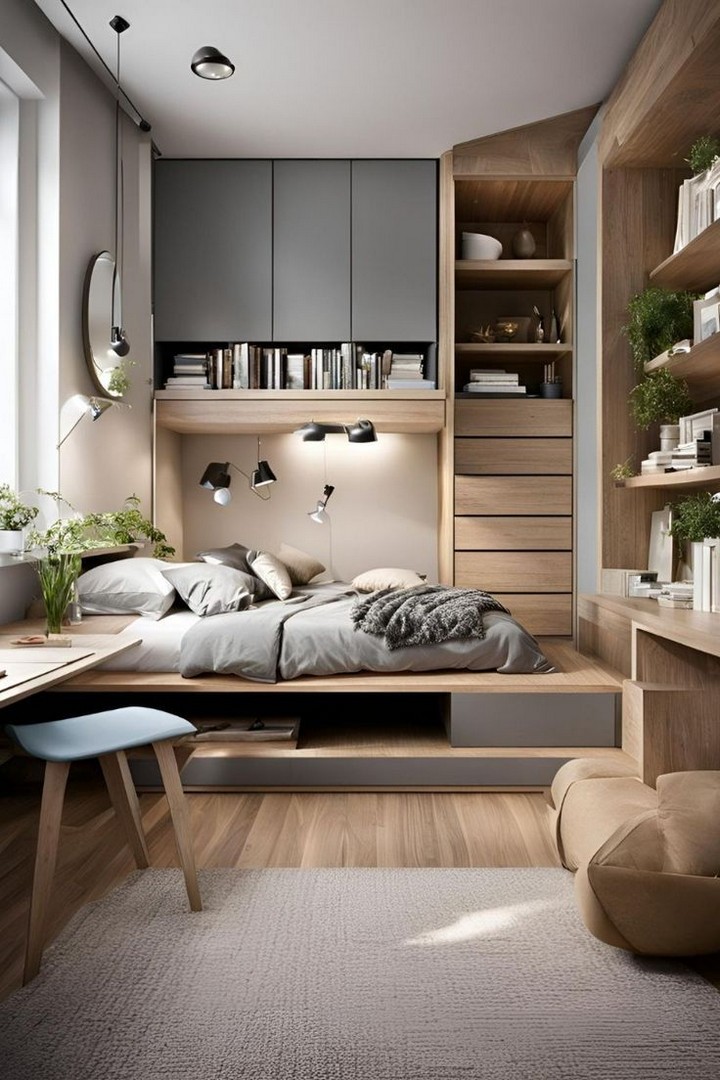
6. Elevation Changes
If your lease allows for minor modifications, consider creating a platform for your bed area. Even a slight elevation change of 6-12 inches can dramatically define separate zones while providing an opportunity for built-in storage drawers beneath the platform.
This approach is particularly effective in studios with higher ceilings, as it utilizes vertical space without making the room feel crowded. Add subtle lighting beneath the platform edge for an elevated design touch that also serves as nighttime wayfinding.
7. Folding Screens

Embrace the classic room divider with a modern folding screen. Today’s options range from minimalist wooden slats to ornate panel designs that serve as both functional dividers and statement decor pieces.
The advantage of screens lies in their flexibility—they can be repositioned as needed or folded away entirely when you want to open up your space. Look for designs that reflect light or incorporate interesting textures to add dimension to your studio.
Multi-Functional Furniture Solutions
8. Sofa Beds Beyond the Basic Futon
Today’s convertible sofas have evolved far beyond the chunky futons of college days. Look for sleek designs with smooth mechanisms that transform from stylish seating to comfortable beds without compromising on either function.
Consider options like pull-out sofas with storage compartments beneath the seats, or modern click-clack designs that recline into sleeping position without requiring additional floor space. Investing in a high-quality convertible piece eliminates the need for a separate bed and sofa, instantly freeing up precious square footage.
9. Murphy Beds with Integrated Features
Wall beds have experienced a renaissance in small-space design, now incorporating desks, shelving, and even sofas that remain usable when the bed is stowed away. These ingenious systems allow your bedroom to transform into a home office or living area during waking hours.
While Murphy beds represent a more significant investment, they offer the most dramatic space-saving solution by completely removing your bed from the equation when not in use. Modern versions feature lightweight mechanisms that make daily conversion simple.
10. Nesting Tables
Replace a single coffee table with a set of nesting tables that can be expanded when entertaining guests and tucked away when extra floor space is needed. This adaptable solution provides surface area only when necessary.
Look for designs with varying heights that can be used as side tables throughout your space or grouped together to form a larger surface. Materials that match or complement your other furniture will ensure a cohesive look regardless of how the tables are arranged.
11. Extendable Dining Tables
Choose a dining table that adjusts to your changing needs. Drop-leaf designs allow you to expand the surface for dinner parties and collapse it when you need more floor space, while gate-leg tables can shrink to the size of a console when not in use.
For extreme space-saving, consider wall-mounted flip-down tables that disappear entirely when not needed. Position these near windows to create a pleasant breakfast nook that doesn’t permanently occupy valuable floor area.
12. Storage Ottoman Coffee Tables
Replace your standard coffee table with a storage ottoman that serves triple duty as a table (with a tray on top), comfortable seating for guests, and hidden storage for blankets, books, or seasonal items.
Look for designs with firm, flat tops that function well as tables while still providing comfortable seating. Many options feature hinged lids for easy access to the storage compartment within.
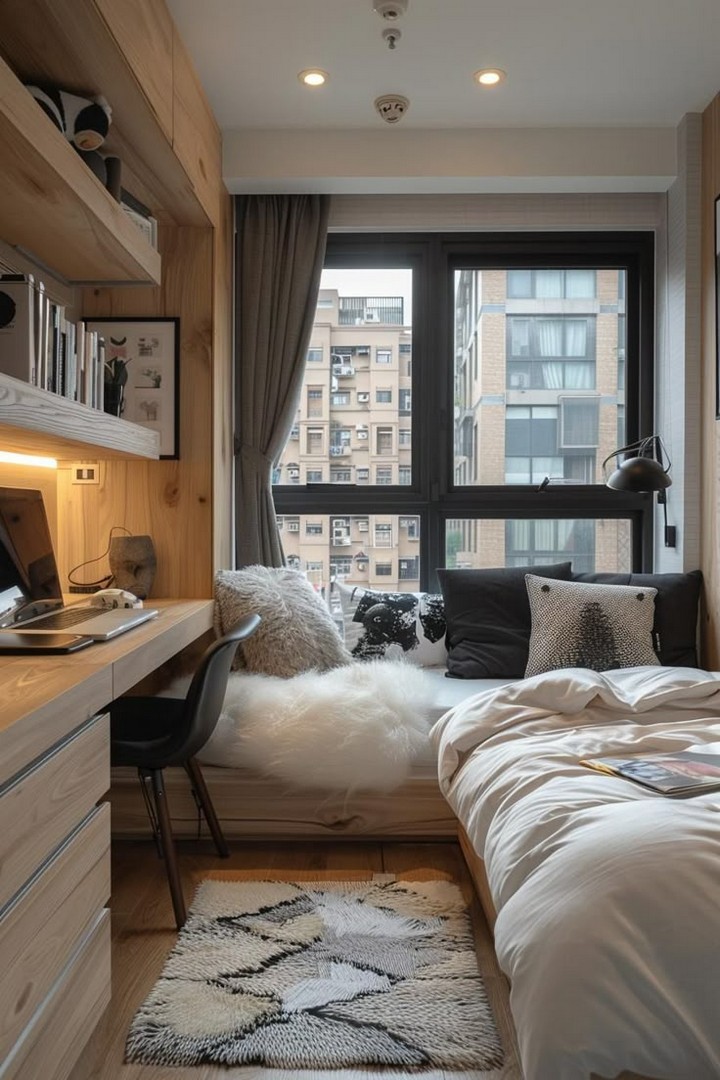
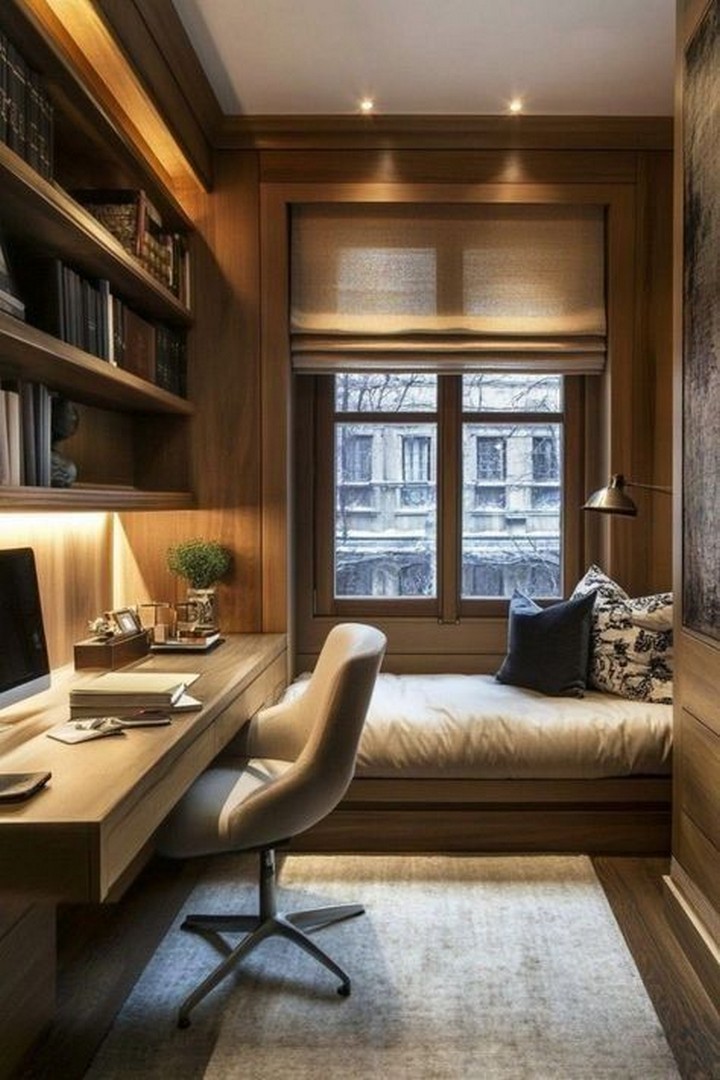
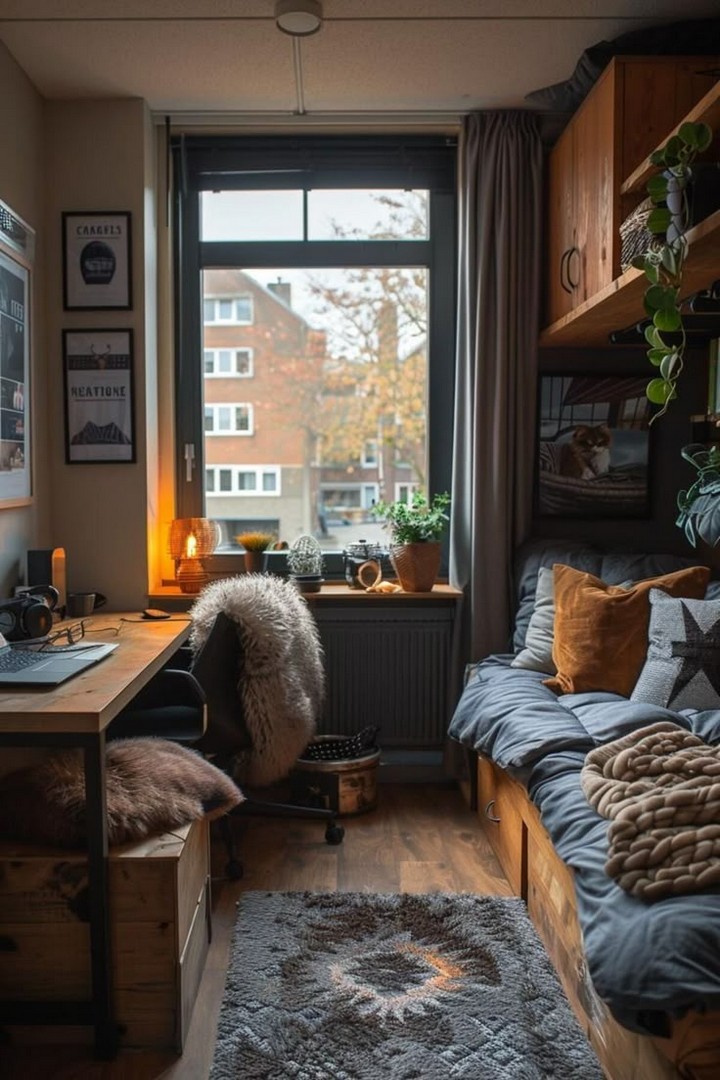
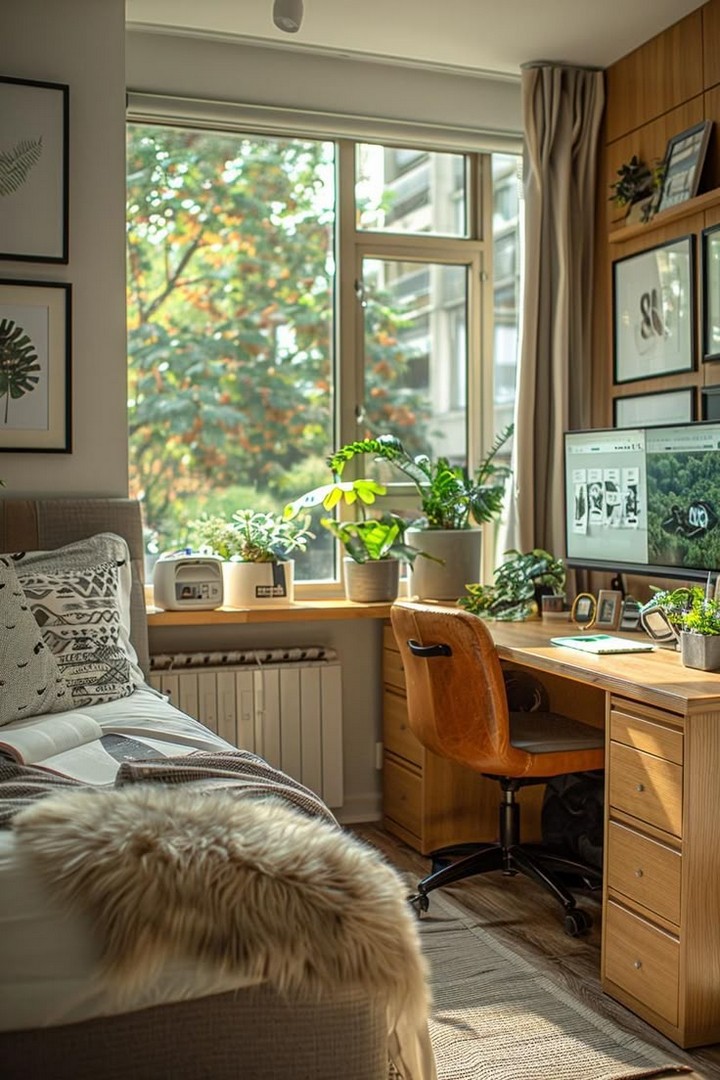
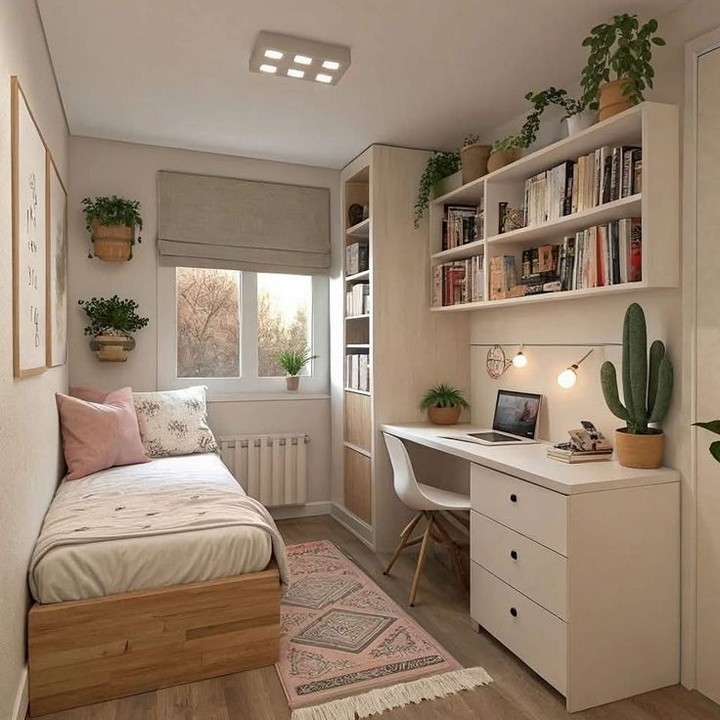
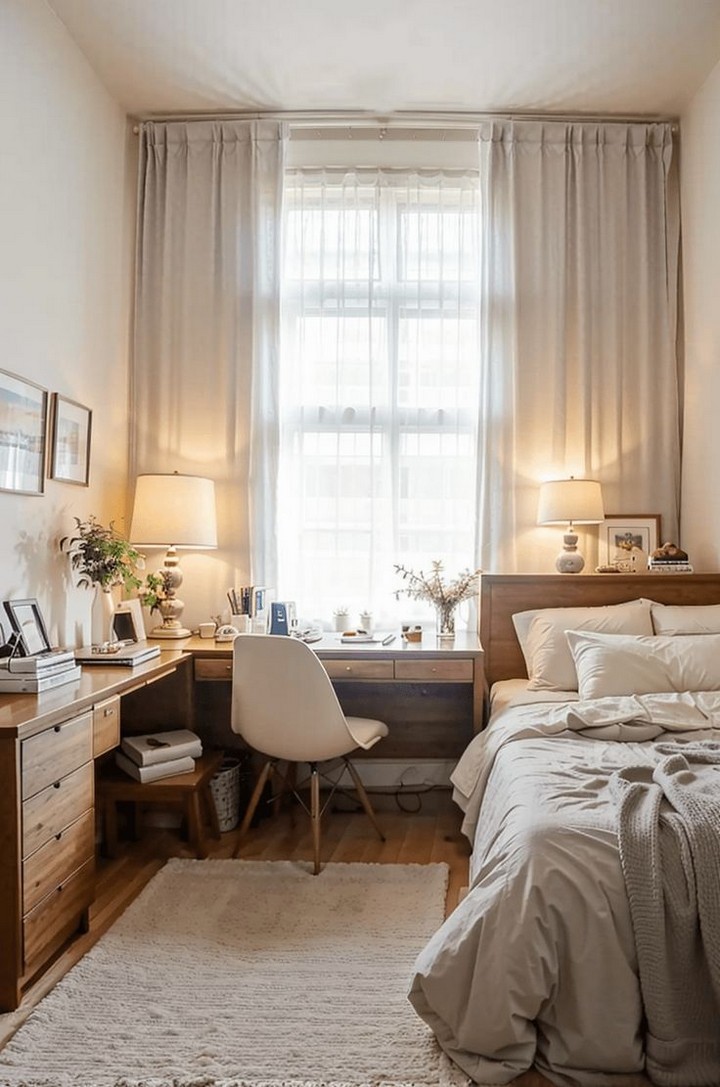
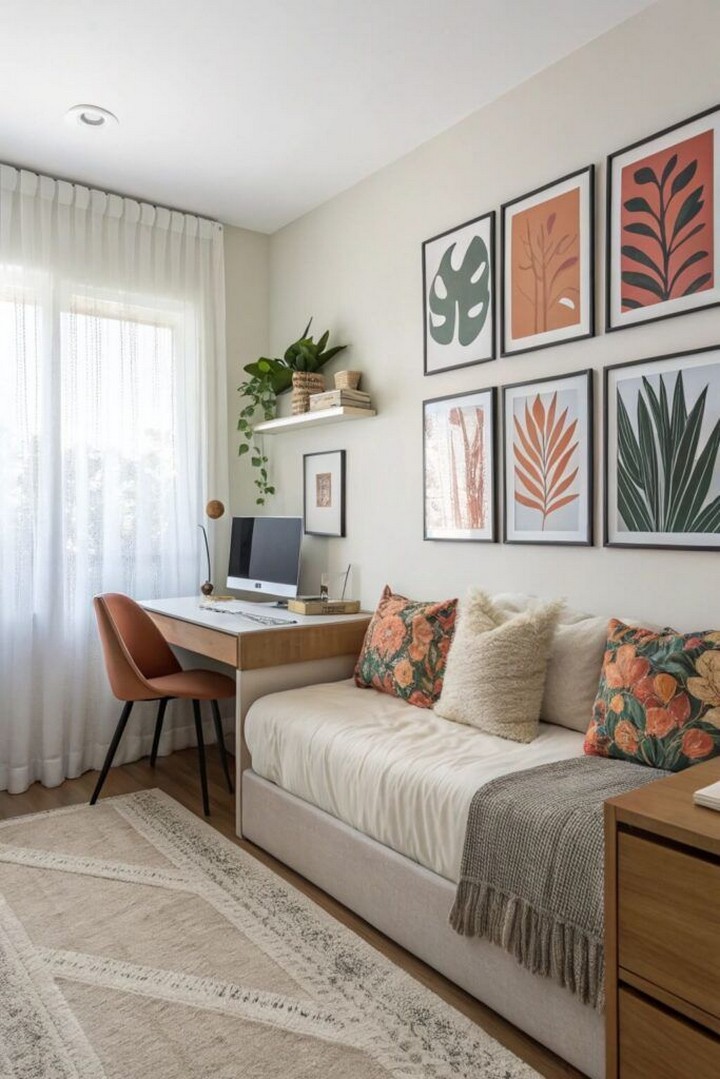
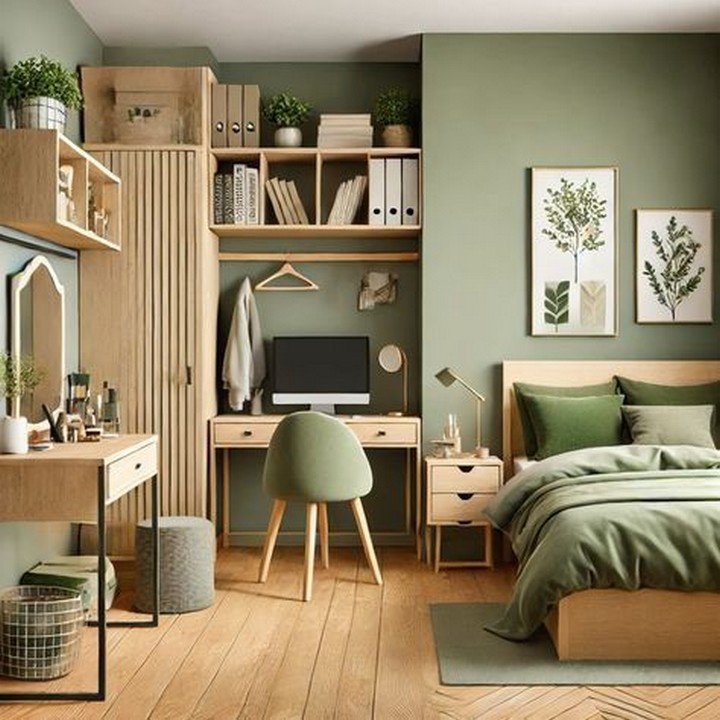
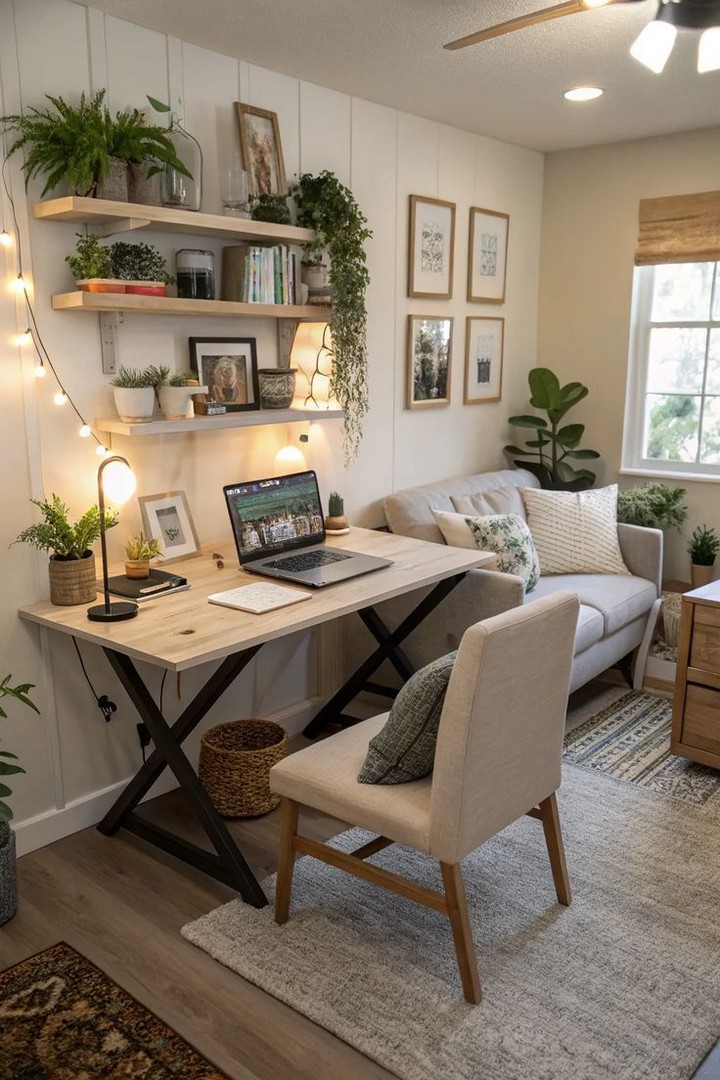
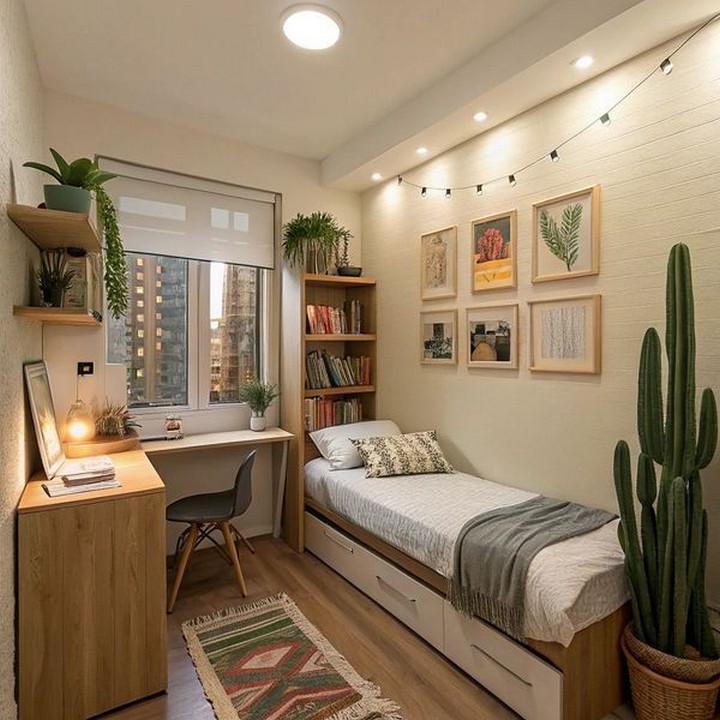
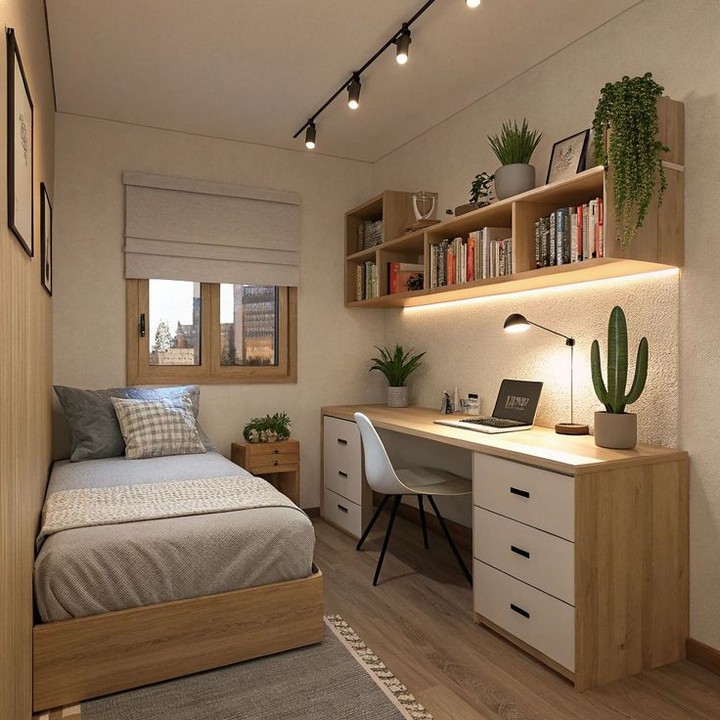
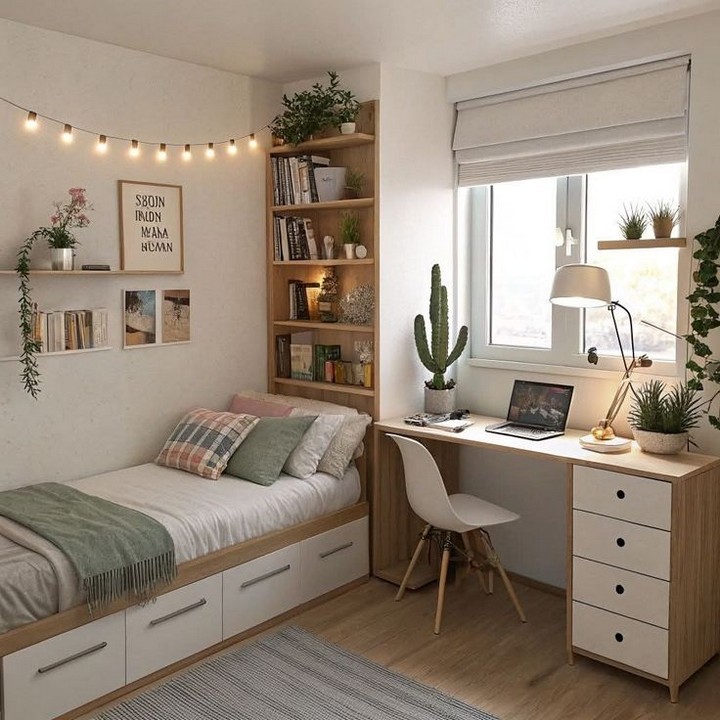
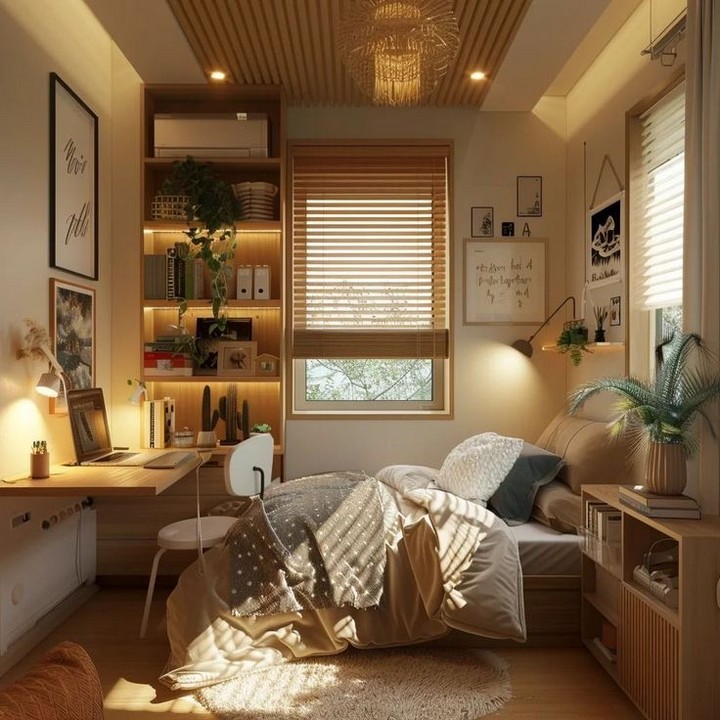
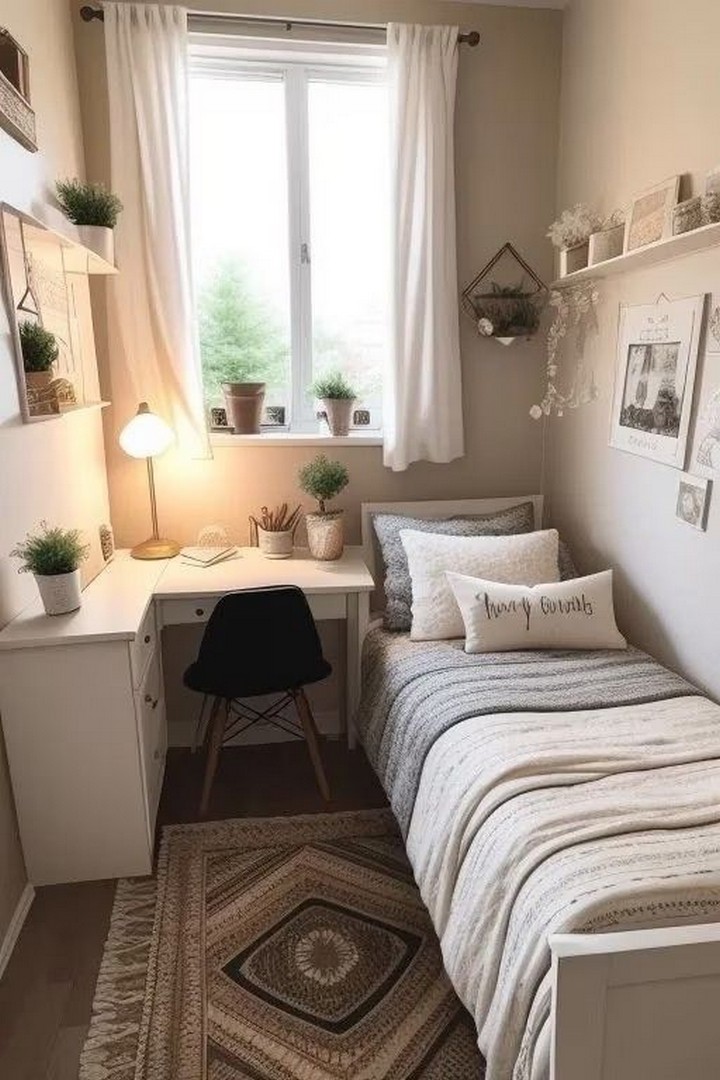
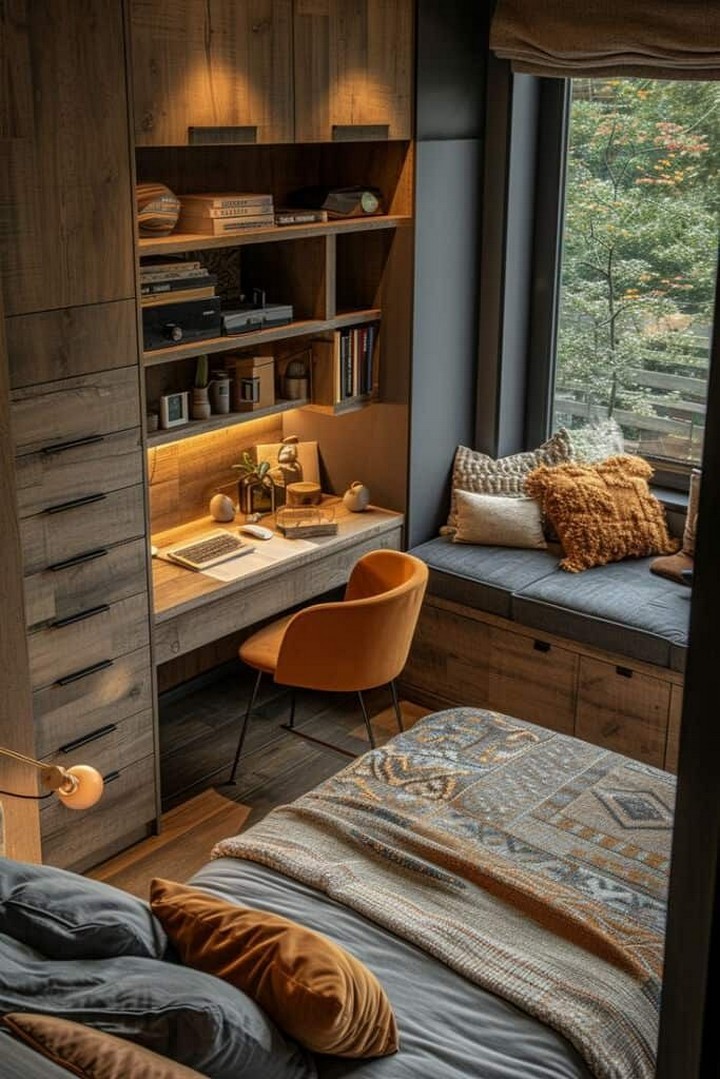
13. Convertible Desks
Incorporate a workspace without dedicating permanent square footage to a desk. Secretary desks fold away when not in use, wall-mounted drop-leaf desks take up minimal space, and console tables can double as workstations with a comfortable chair.
For the most versatile solution, consider a desk that transforms into another piece of furniture entirely, such as a dining table or shelf unit. This ensures that every piece in your studio serves multiple functions.
14. Modular Seating
Invest in modular furniture that can be rearranged to suit different needs—sectional pieces that separate into individual seats, floor cushions that stack away when not in use, or nesting stools that provide extra seating for guests.
These flexible seating options allow you to accommodate varying numbers of people without cluttering your space with rarely-used furniture. Choose pieces in coordinating fabrics for a cohesive look even when arranged separately.
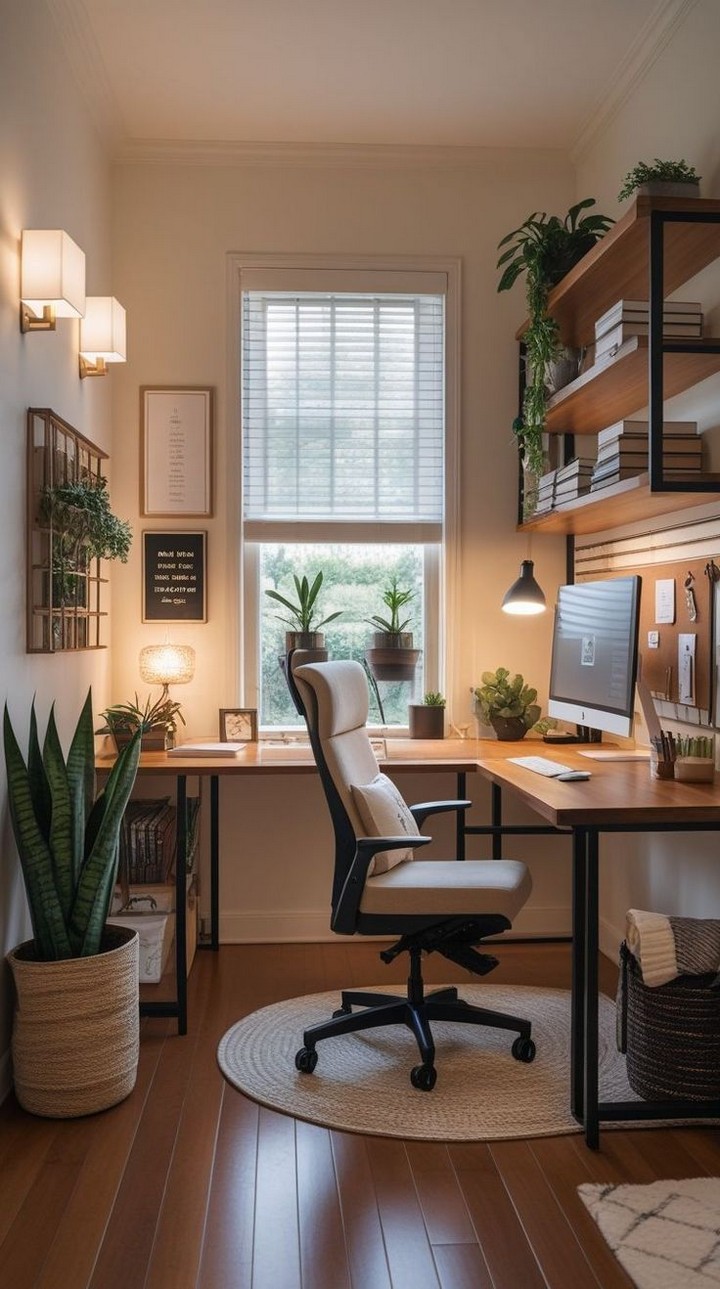
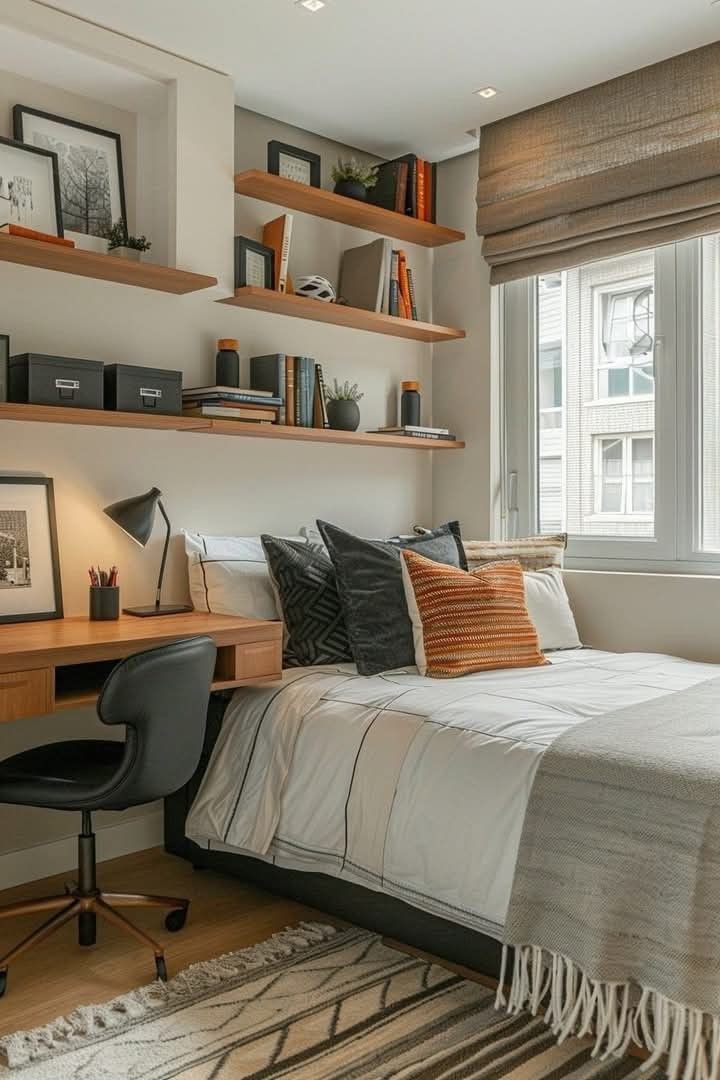
Maximizing Vertical Space
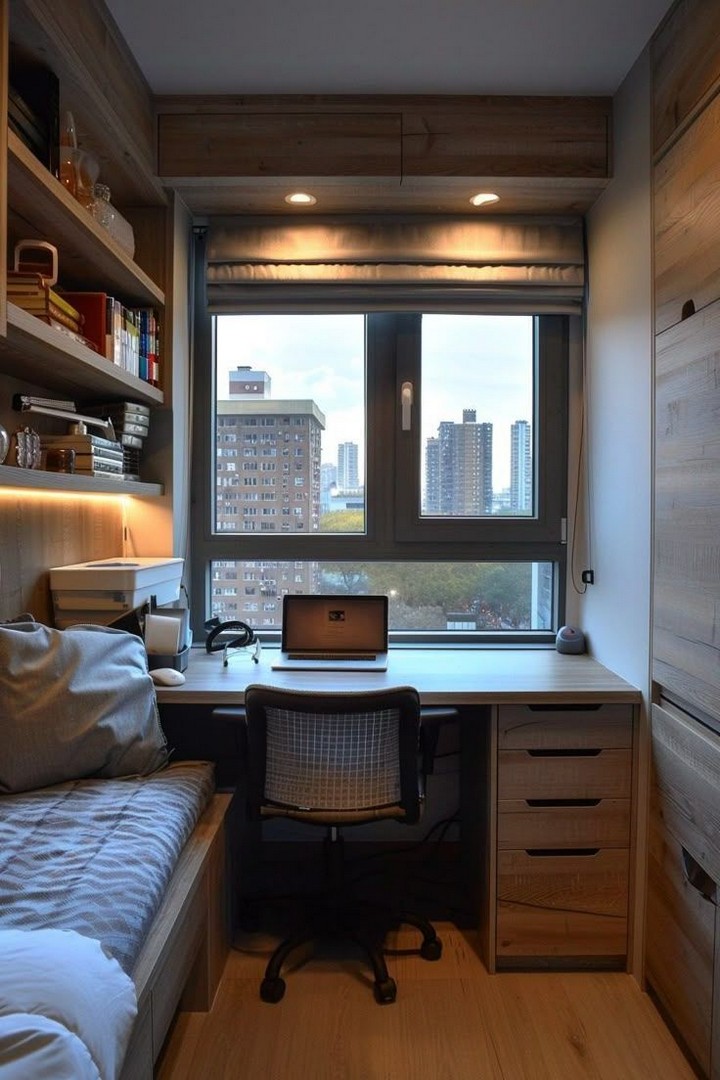
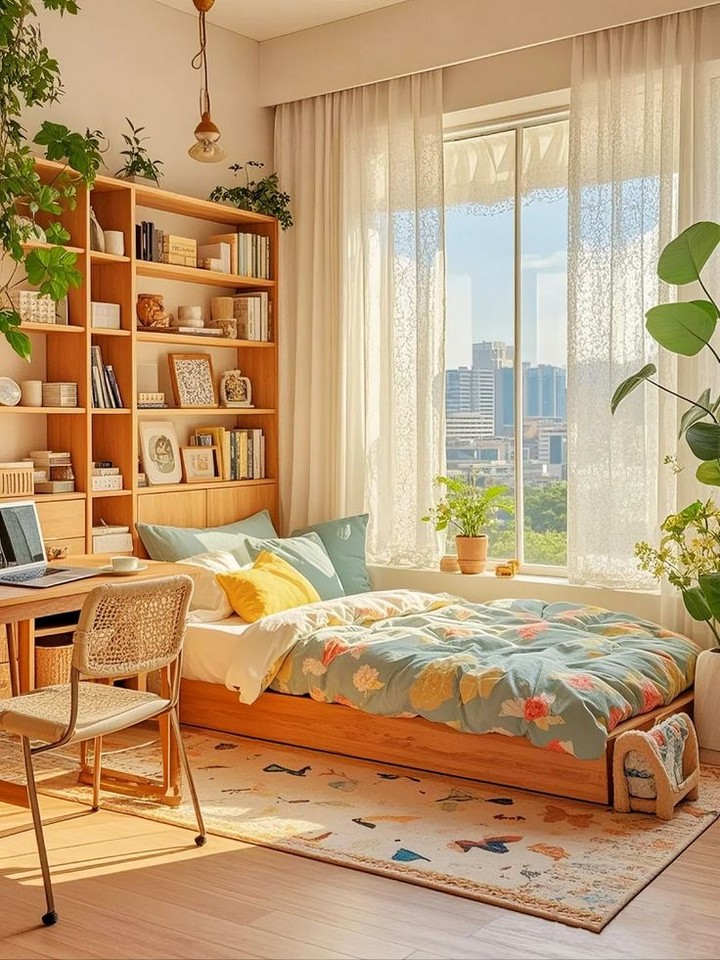
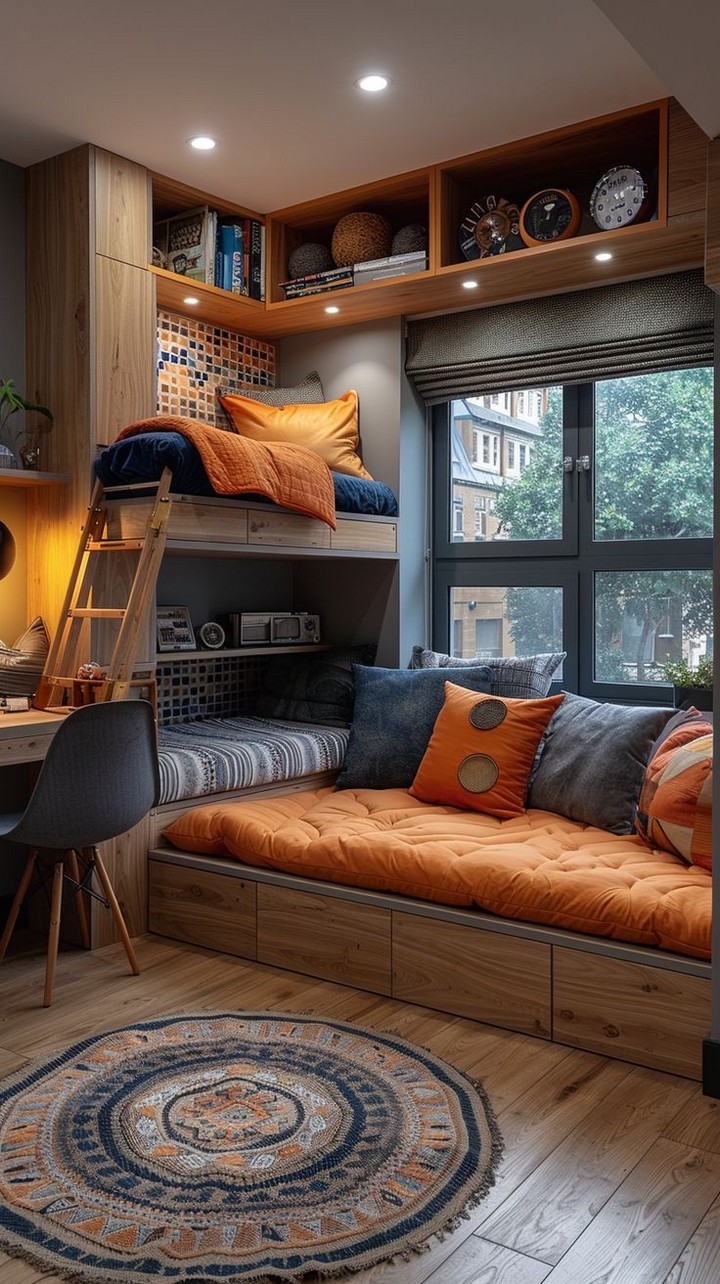
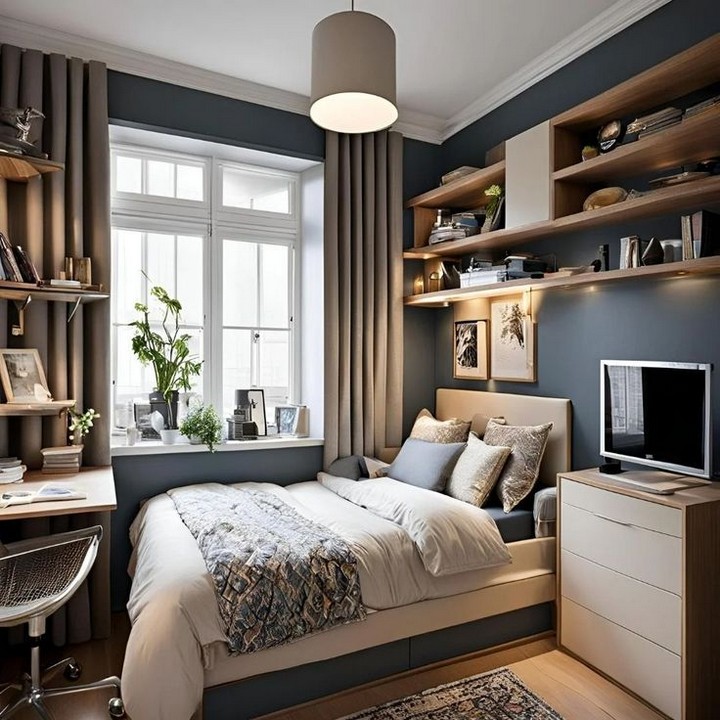
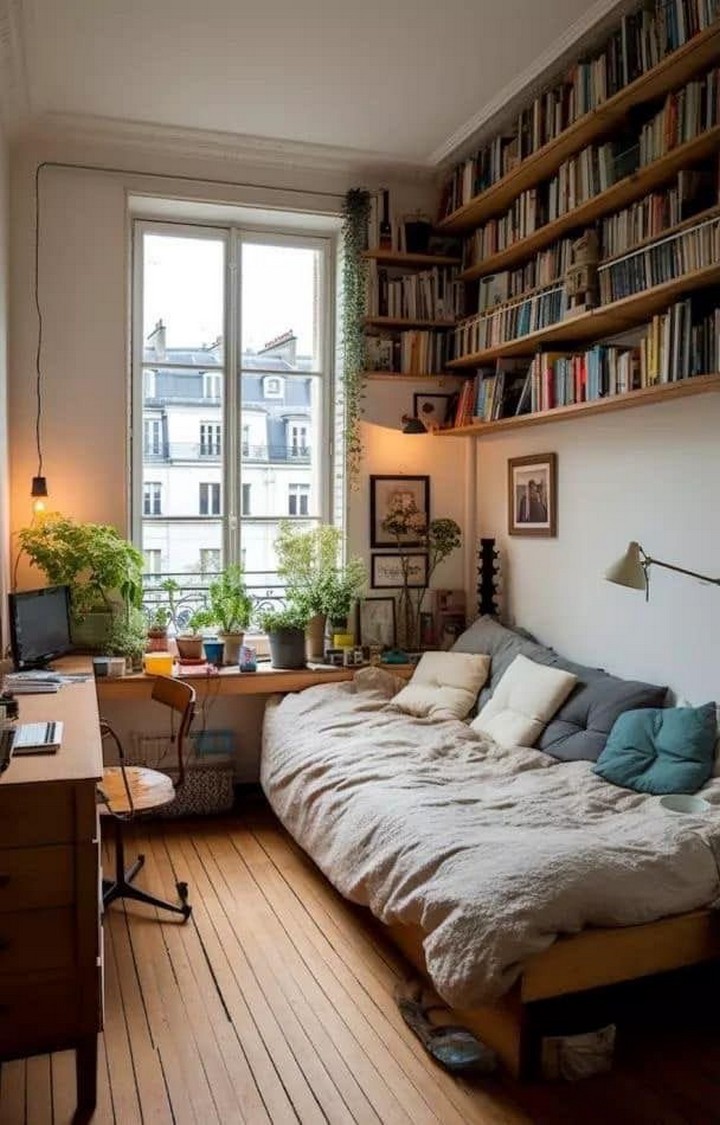
15. Floor-to-Ceiling Bookshelves
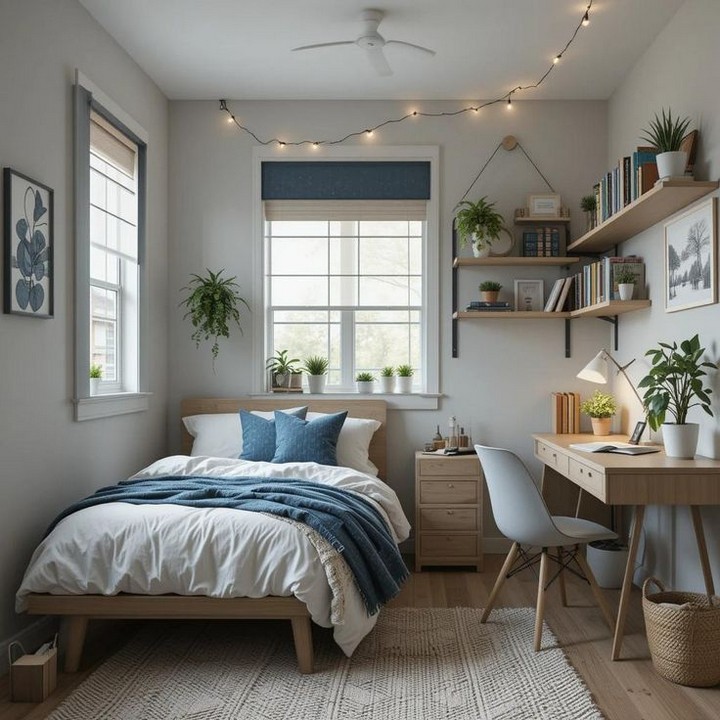
Take advantage of your wall height with tall bookshelves that draw the eye upward, creating the illusion of higher ceilings while providing substantial storage. Custom built-ins make the most of every inch, but freestanding units can work just as well.
Reserve lower shelves for items you access daily and upper shelves for seasonal storage or display pieces. Consider installing a rolling library ladder for a dramatic design element that also provides practical access to high storage.
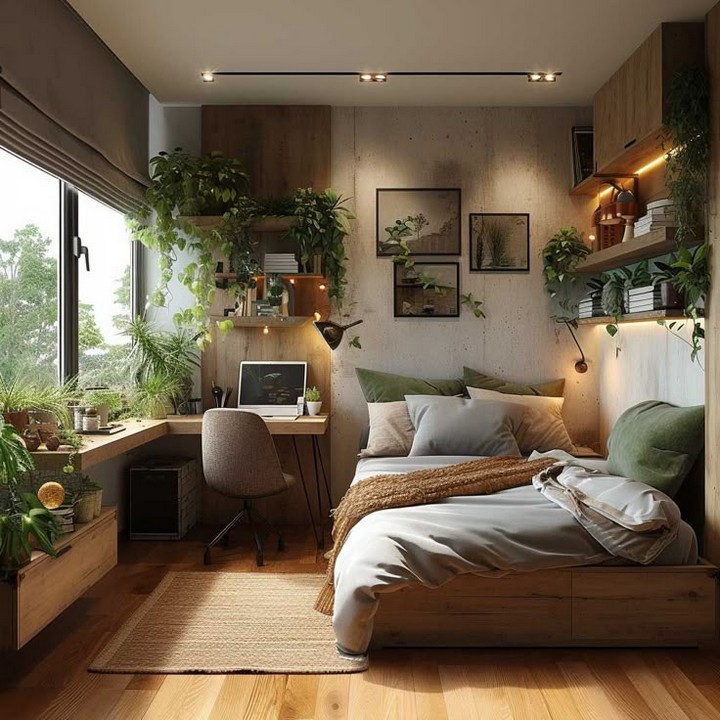
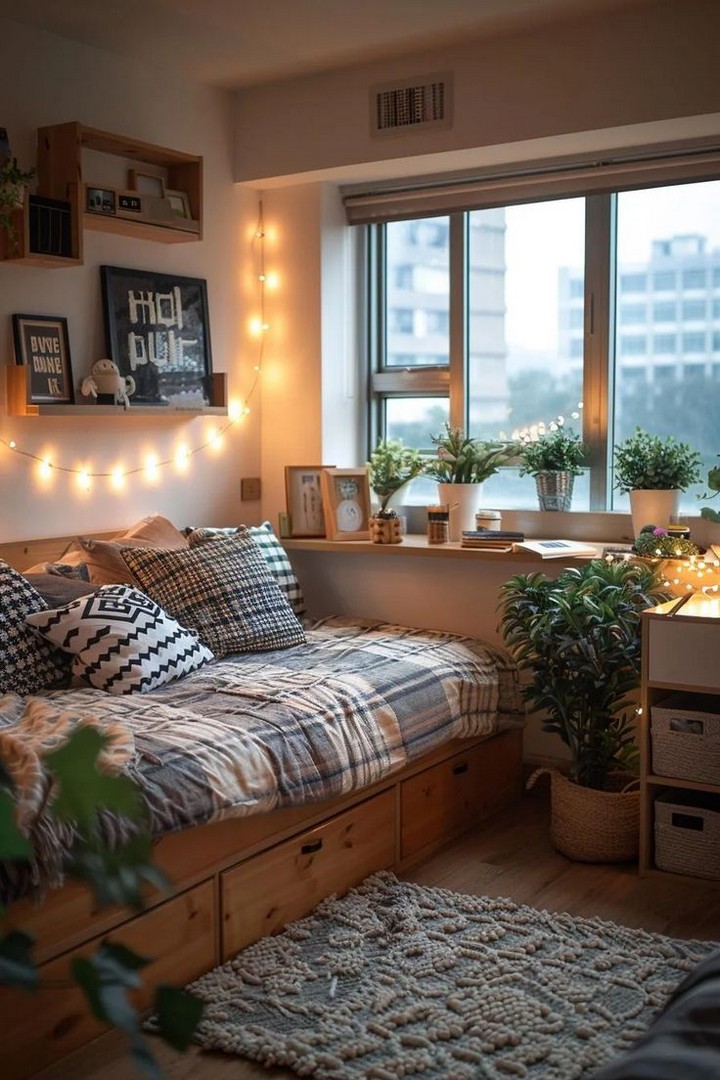
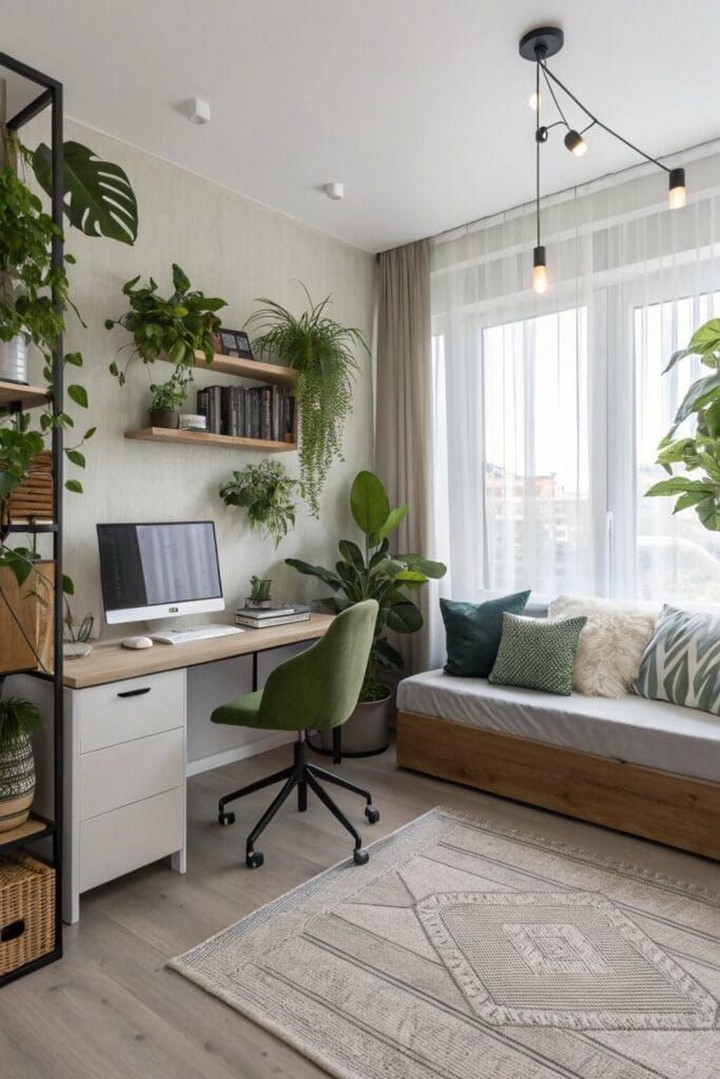
16. Vertical Garden Systems
Bring nature into your space without sacrificing precious floor area by installing vertical garden systems. Wall-mounted planters, hanging pots, or freestanding vertical gardens add life and color to your studio while improving air quality.
Beyond their aesthetic value, plants create a sense of wellbeing that’s particularly valuable in compact living environments. Choose low-maintenance varieties like pothos, snake plants, or air plants if you’re concerned about upkeep.
17. Pegboard Organization Systems
Install versatile pegboard panels in kitchens, workspaces, or entryways to create customizable storage that adapts to your changing needs. Modern pegboard systems offer a range of hooks, shelves, and containers that can be rearranged at will.
This approach keeps frequently used items visible and accessible while freeing up drawer and cabinet space for items that don’t need to be displayed. Paint your pegboard to match your wall color for a subtle look, or choose a contrasting hue to create a design feature.
18. Ceiling-Mounted Storage
Look up to discover untapped storage potential. Ceiling-mounted racks in kitchens can hold pots and pans, while fabric hammocks can store extra pillows or seasonal bedding in sleeping areas. Even bicycles can be hoisted to the ceiling with the right pulley system.
This approach utilizes space that would otherwise go unused while keeping floor and wall areas clear for other purposes. Just ensure any ceiling-mounted storage is securely installed and easily accessible when needed.
19. Over-Door Organizers
Maximize every inch by utilizing the often-overlooked space on the back of doors. Modern over-door organizers go well beyond the basic shoe pocket, with sleek designs for bathroom supplies, accessories, office materials, or pantry items.
Look for slim-profile options that won’t prevent doors from closing properly, and consider how the organizer will look when the door is open—options with attractive backing materials or finished in your wall color will blend more seamlessly.
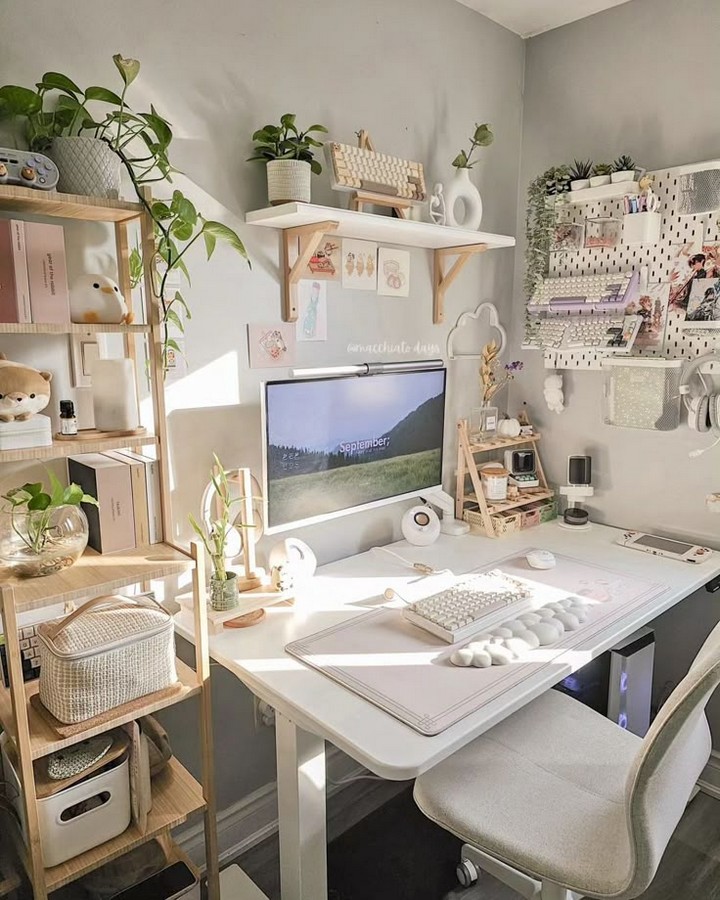
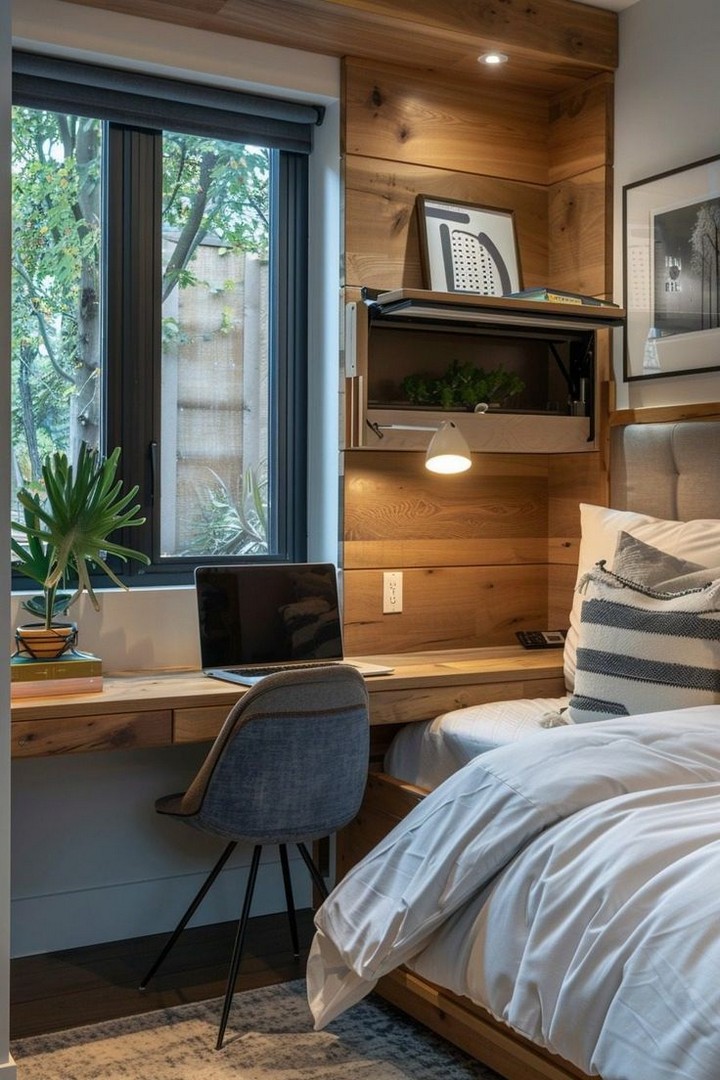
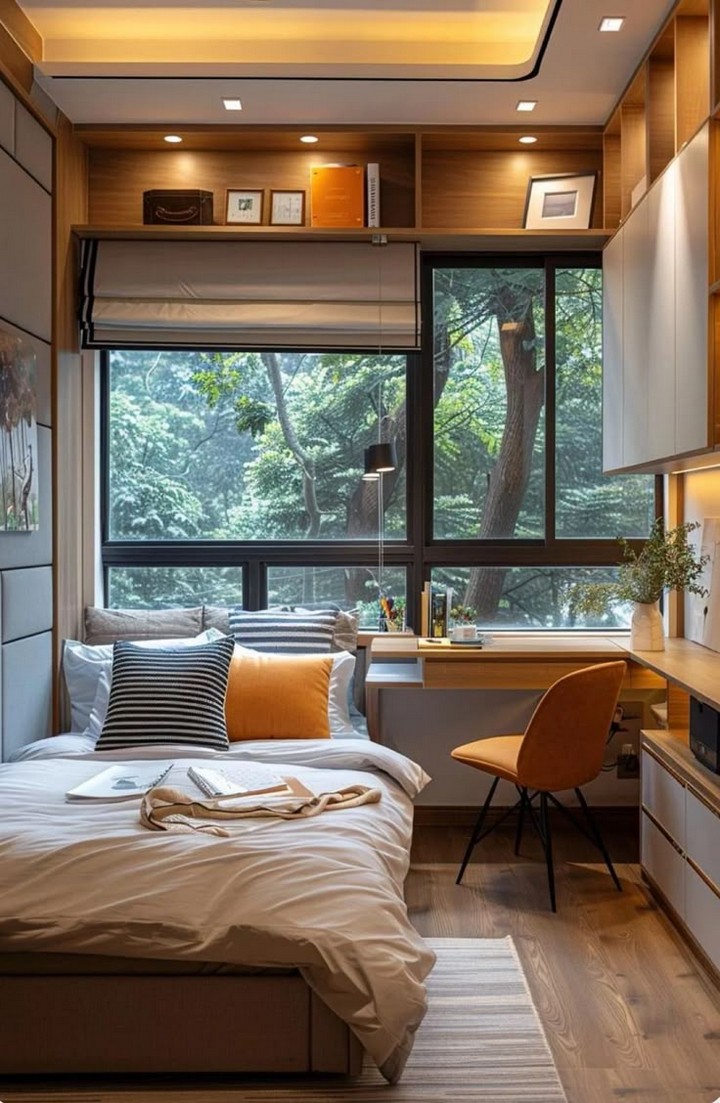
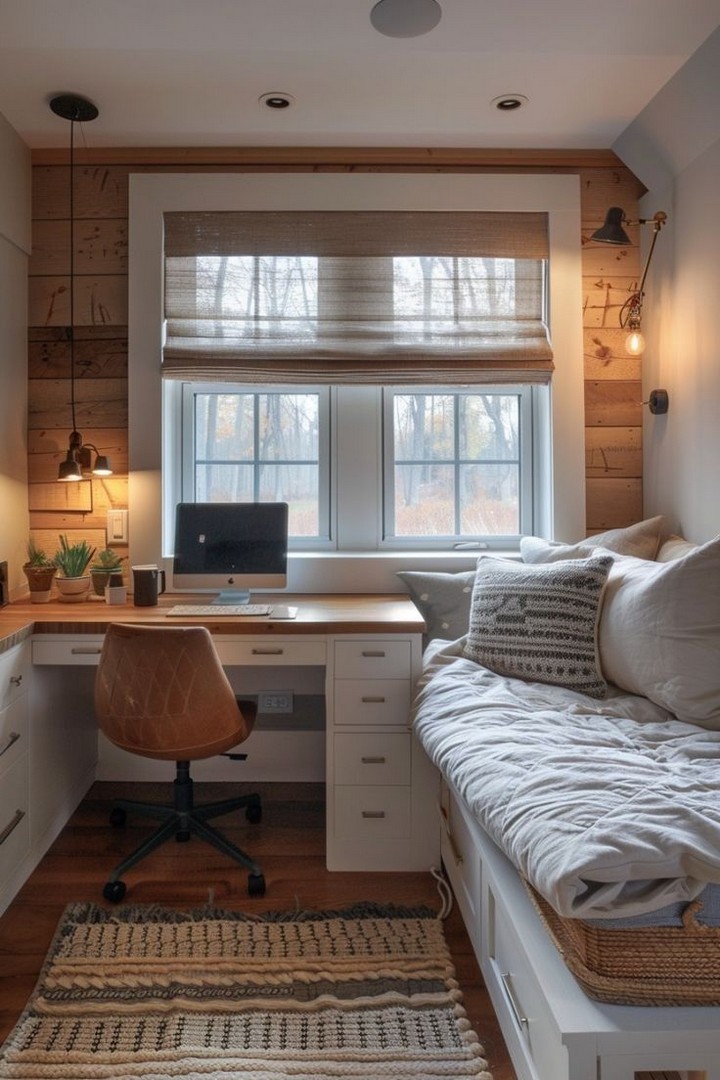
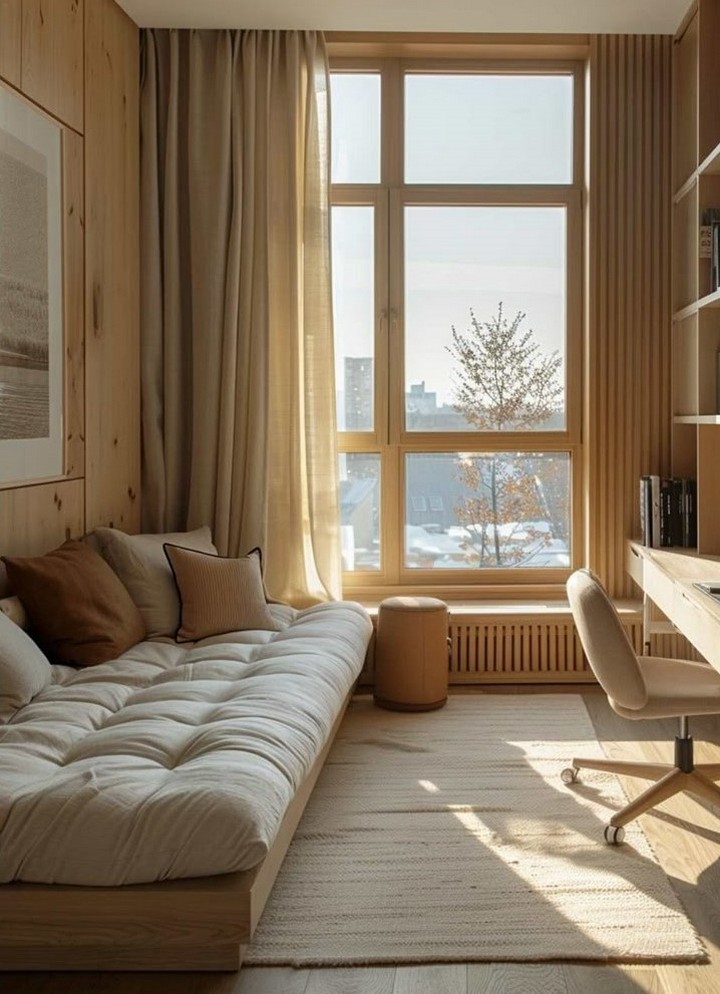
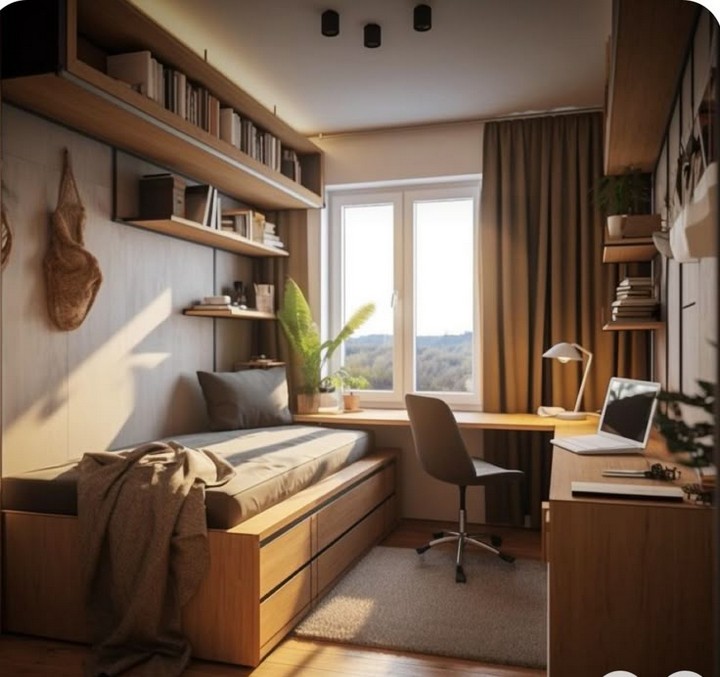
20. Wall-Mounted Workstations
Replace traditional desks with wall-mounted surfaces that fold away when not in use. These can range from simple floating shelves with hidden brackets to sophisticated systems with integrated storage compartments and cable management features.
The key advantage is reclaiming floor space that would typically be occupied by desk legs, creating a more open feel in your living area. When selecting mounting height, ensure the surface works ergonomically with your preferred seating option.
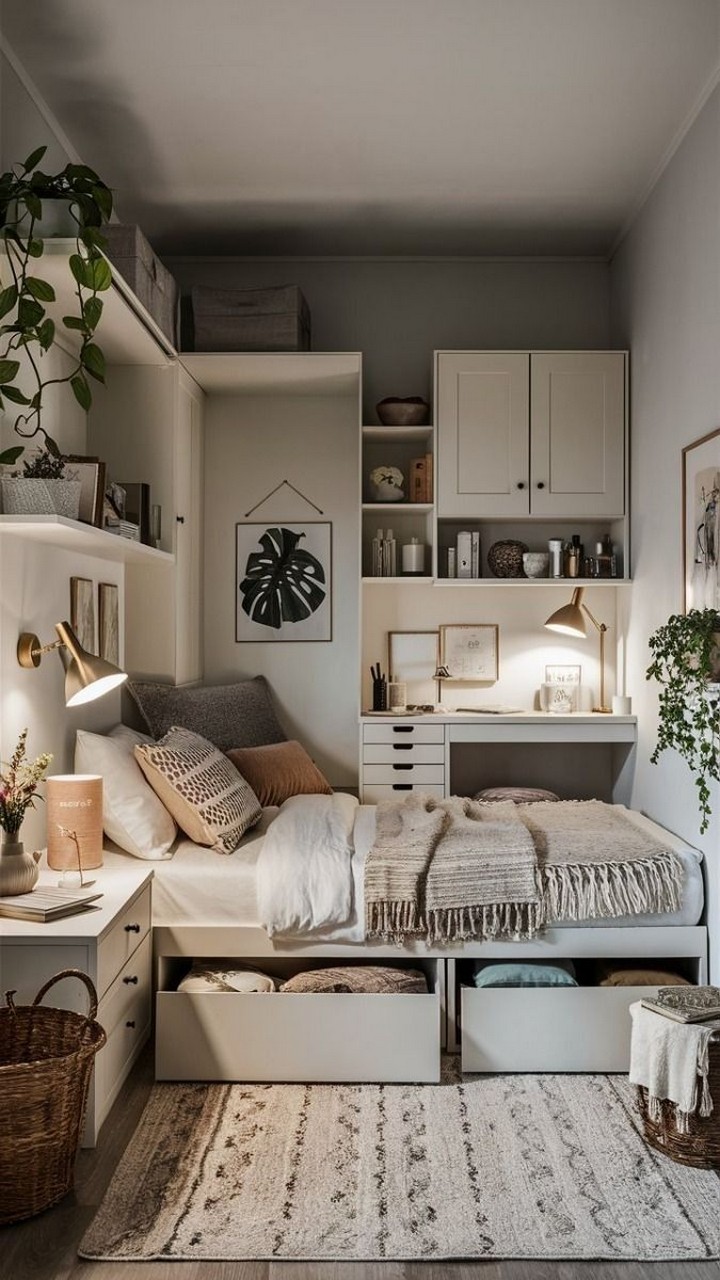
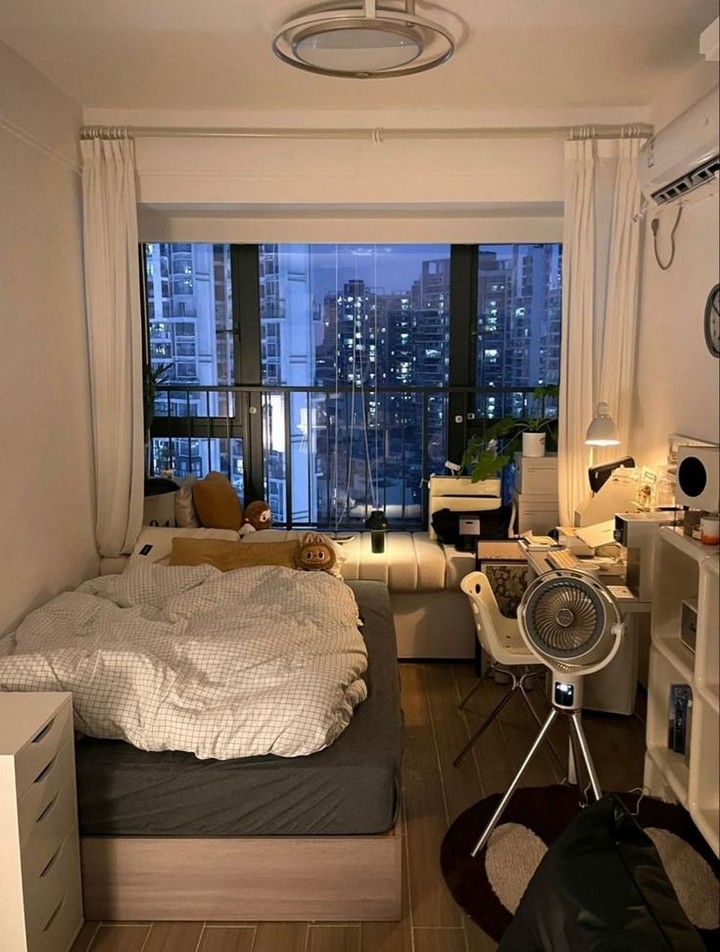
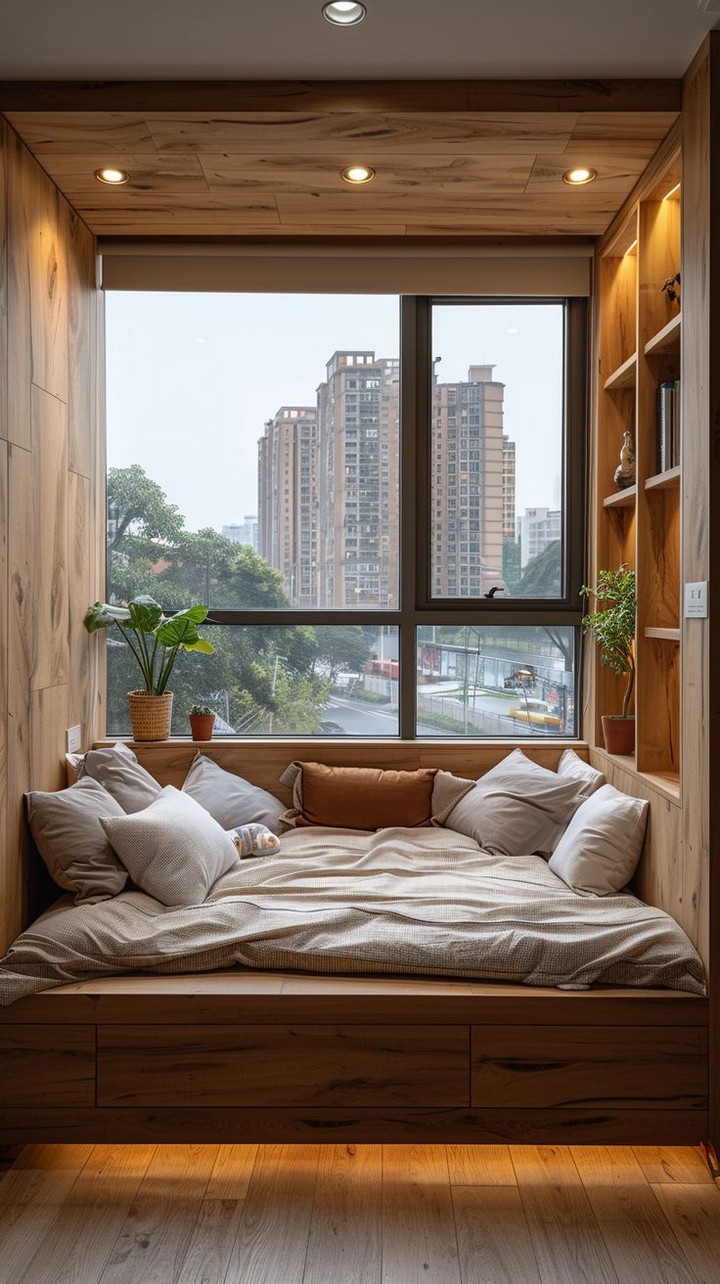
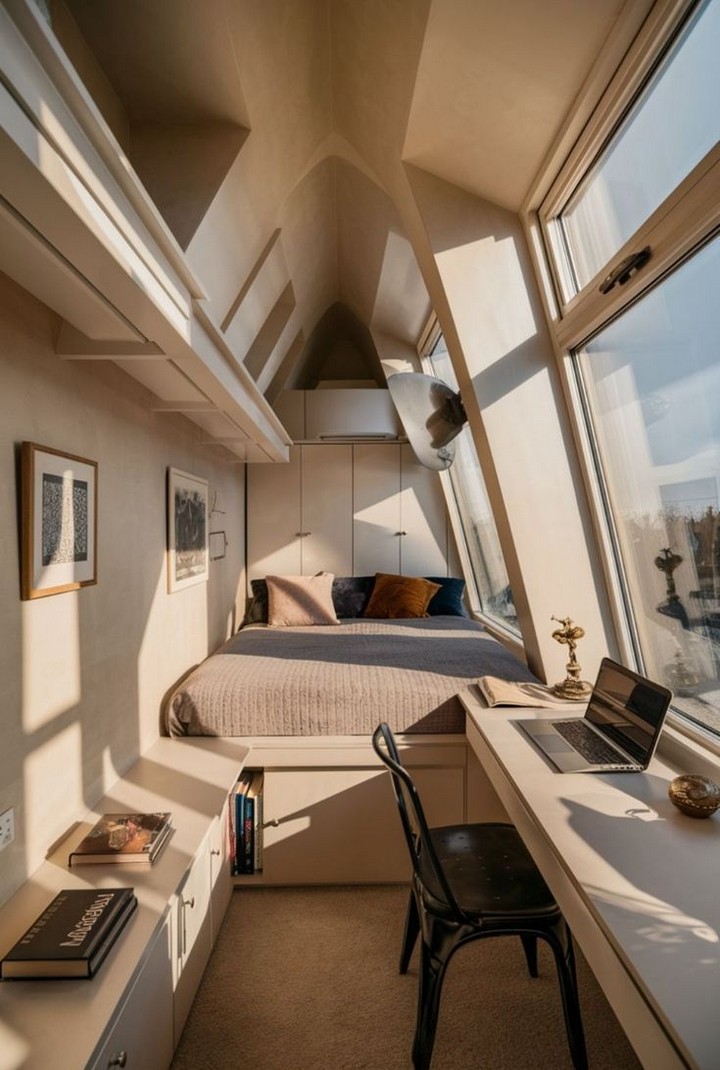
21. Elevated Bed Platforms with Storage
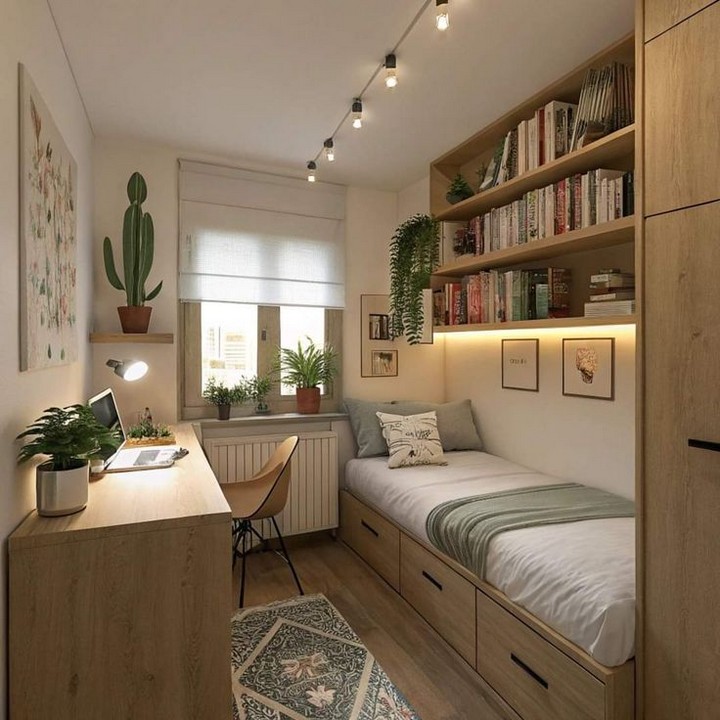
Raise your bed to create valuable storage space underneath. Platform beds with built-in drawers provide organized storage that’s easily accessible, while higher loft-style arrangements can accommodate a desk, dresser, or seating area below.
This approach effectively stacks functions vertically rather than spreading them horizontally, dramatically increasing the usable square footage of your studio. Choose a height that feels comfortable for daily access too high may become inconvenient over time.
Clever Storage Solutions
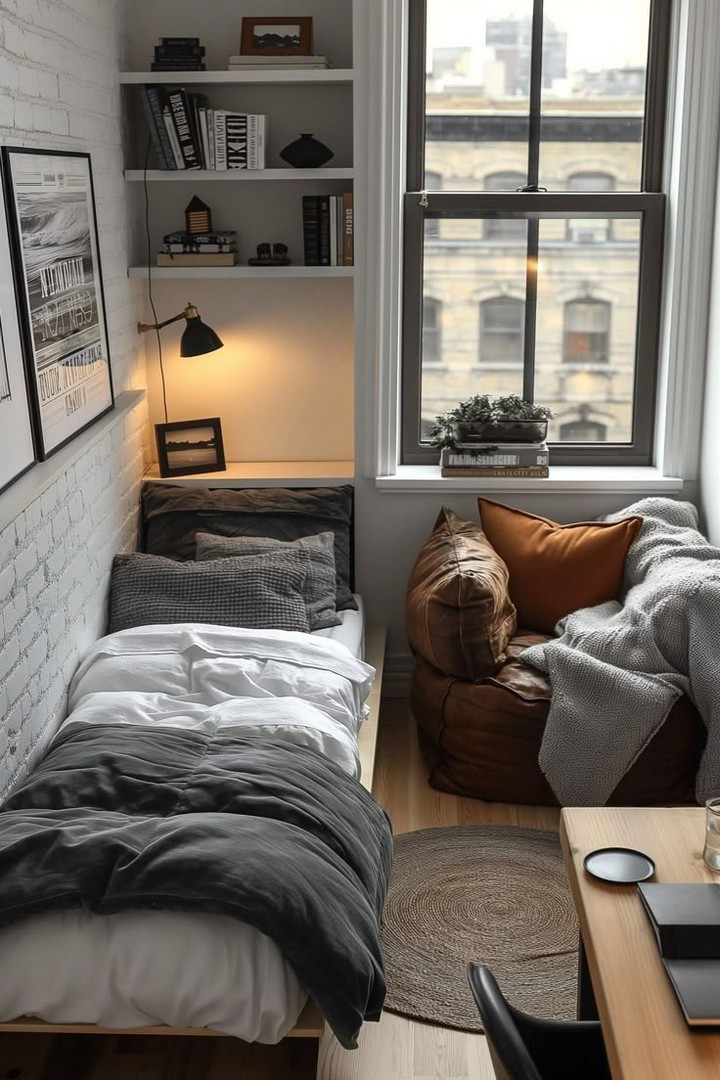
22. Hidden Storage Furniture
Seek out furniture with concealed storage compartments beds with drawers beneath, coffee tables with lift-top mechanisms, or window seats with space inside for extra linens or seasonal clothing.
These pieces maintain clean visual lines while providing substantial storage capacity, helping manage clutter without adding separate storage units. Look beyond obvious options: many side tables, headboards, and even dining chairs now incorporate hidden storage features.
23. Magnetic Organization Systems
Install magnetic strips or boards in strategic locations to hold metal objects without consuming surface space. In kitchens, magnetic knife strips free up drawer space; in offices, magnetic boards can organize paper clips and other small metal supplies.
This approach works particularly well for frequently used items that benefit from being visible and accessible. Choose systems designed specifically for your intended use—kitchen magnetic strips, for example, should be stronger than those intended for lightweight office supplies.
24. Behind-the-Door Shelving
Maximize awkward spaces with slim shelving units designed to fit behind doors. These narrow shelves can store anything from spices and cleaning supplies to shoes and accessories, depending on their location.
Because these units occupy otherwise unused space, they add storage without impacting your room’s flow or visual openness. Ensure the depth allows your door to open and close freely, and consider adding small guardrails to prevent items from falling when the door moves.
25. Furniture with Exposed Storage
Instead of hiding everything away, make a design feature of beautiful objects with furniture that incorporates open storage. Beds with bookcase headboards display favorite reads, while coffee tables with magazine shelves beneath keep inspiration close at hand.
This approach encourages curation of your possessions, as items will remain visible rather than tucked away. The key to success is maintaining organization within these open systems to prevent a cluttered appearance.
26. Under-Sink Expandable Organizers
Maximize awkward bathroom and kitchen storage with expandable organizers designed specifically for the challenging space under sinks. These adjustable systems work around pipes and other obstacles to utilize every available inch.
Look for options with adjustable shelves or drawers that can be configured to your specific under-sink layout. Water-resistant materials are essential, particularly in bathrooms where spillage is common.
27. Vacuum Storage Bags
Reclaim dresser and closet space by compressing seasonal clothing, extra bedding, or bulky winter coats in vacuum storage bags. These simple tools can reduce volume by up to 75%, dramatically increasing your storage capacity without requiring additional furniture.
Store compressed bags under your bed, on high closet shelves, or in suitcases that would otherwise sit empty. Label each bag clearly to find items quickly when seasons change.
28. Tension Rod Divisions
Install tension rods in cabinets to create vertical divisions for storing baking sheets, cutting boards, or cleaning supplies. In closets, double your hanging space by adding a second rod below the existing one for shorter items like shirts and folded pants.
This no-tools solution works well in rental properties where permanent modifications aren’t allowed. Look for rods with rubber ends that won’t damage surfaces while providing secure support.
Visual Space-Expanding Techniques
29. Strategic Mirror Placement
Amplify natural light and create the illusion of expanded space with carefully positioned mirrors. A large mirror opposite a window reflects both light and view, essentially doubling the perceived dimensions of your space.
Beyond basic wall mirrors, consider mirrored furniture, cabinet fronts, or backsplashes to integrate this space-expanding effect throughout your studio. Antique mirrors with subtle patina add character while still providing the reflective benefits.
30. Monochromatic Color Scheme
Create visual continuity with a consistent color palette that allows the eye to travel uninterrupted throughout your space. Varying shades and textures within a single color family adds interest without creating jarring transitions that can make a studio feel choppy.
This doesn’t mean your apartment must be entirely beige or white a monochromatic scheme can be built around any color. The key is maintaining consistency in undertones across your walls, major furniture pieces, and textiles.
31. Glass and Lucite Furniture
Replace visually heavy pieces with transparent alternatives that allow the eye to pass through, reducing the perceived density of furniture in your space. Glass dining tables, Lucite chair legs, or acrylic console tables maintain functionality without visual weight.
These transparent materials are particularly effective for pieces in central locations or traffic paths, where solid furniture would create visual blockages. Pair with subtle lighting to create beautiful reflections and enhanced depth.
32. Continuous Flooring

Install the same flooring material throughout your entire studio to create a seamless flow that expands the perceived space. When the eye doesn’t encounter transitions between materials, the space reads as larger and more cohesive.
If replacing flooring isn’t an option, large area rugs that cover most of your space can create a similar effect. Choose patterns and colors that complement your existing flooring to minimize contrast at the edges.
33. Raised Furniture
Select sofas, beds, and storage pieces with visible legs rather than those that sit flush with the floor. The visible space beneath furniture creates a sense of airiness and makes the floor plane appear to extend further.
This small detail makes a significant difference in how spacious your studio feels. Even a few inches of clearance beneath key pieces contributes to a lighter, more open atmosphere that’s particularly valuable in compact spaces.
34. Strategic Lighting Layers
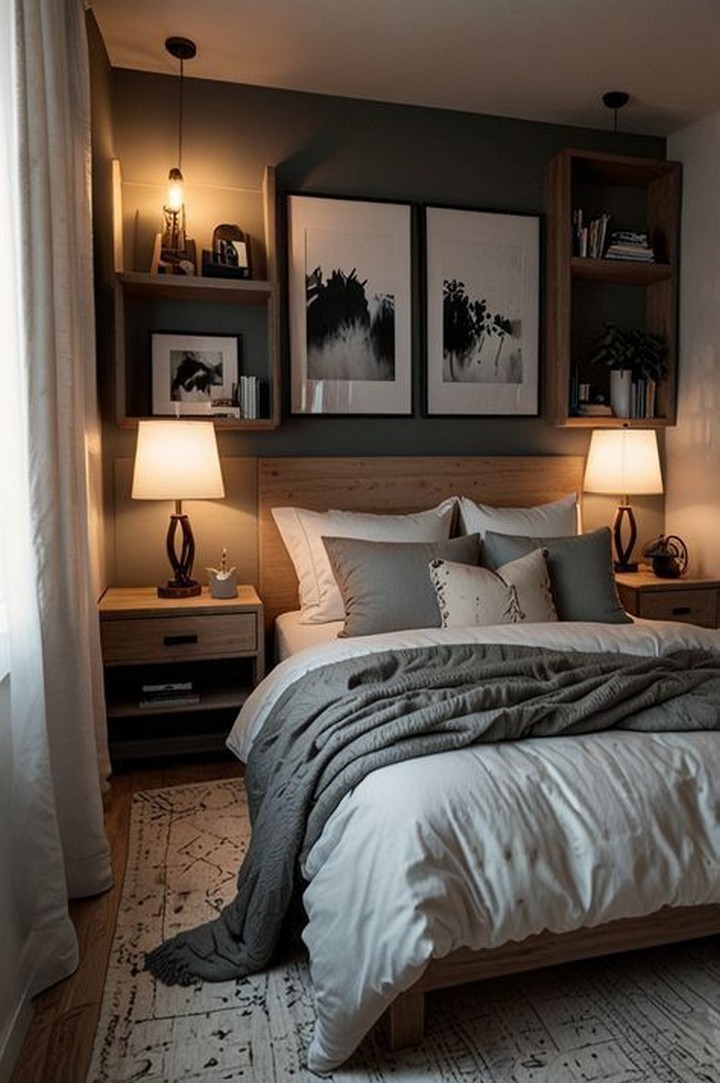
Create depth through layered lighting that illuminates different zones and highlights architectural features. A combination of ambient, task, and accent lighting draws the eye around the space, creating interest and dimension.
Wall sconces save valuable table space while providing flattering indirect light. Consider adjustable options that can redirect illumination as needed for different activities throughout your studio.
35. Vertical Stripes and Patterns

Incorporate vertical elements that draw the eye upward, making your ceiling appear higher. Striped wallpaper, tall bookcases, or floor-to-ceiling curtains all contribute to this heightening effect.
When using patterns, maintain proportion appropriate to your space—oversized patterns can overwhelm small rooms, while patterns that are too small may create visual clutter. Vertical elements work best when they extend fully from floor to ceiling without interruption.
Stylish Decor That Doesn’t Crowd
36. Wall-Mounted Lighting
Replace floor and table lamps with wall-mounted fixtures that provide illumination without consuming precious surface space. Adjustable sconces offer directed task lighting for reading or working, while minimalist designs add architectural interest to plain walls.
Position these fixtures strategically to illuminate key areas above your bed for nighttime reading, beside your sofa for evening relaxation, or over your dining area to define that zone with a pool of light.
37. Floating Shelves Instead of Bookcases
Trade bulky bookcases for sleek floating shelves that provide display and storage space without the visual weight of furniture. Arrange these in asymmetrical configurations to create artistic wall compositions that double as functional storage.
Limit the depth of shelves to 8-10 inches to maintain clearance in traffic areas while still accommodating books and display objects. Consider the weight capacity carefully when planning what to display—not all floating shelf systems are created equal.
38. Minimal Window Treatments
Maximize natural light with simple window treatments that don’t obstruct views or add visual clutter. Roller shades that completely disappear when open, sheer curtains that filter light beautifully, or minimal blinds that tuck away compactly all maintain your connection to the outdoors.
Mount curtain rods close to the ceiling rather than directly above the window frame to create the illusion of taller windows and higher ceilings. Allow curtains to extend beyond the window width when possible to make windows appear larger when treatments are open.
39. Statement Art Piece
Rather than cluttering walls with many small pieces, choose one large-scale artwork that anchors your space and expresses your personality. This creates a focal point that draws attention away from the size limitations of your studio.
Position this piece where it’s visible from multiple areas of your apartment—above your sofa, opposite your bed, or in your entry area. The right artwork establishes your color scheme and sets the tone for your entire space.
40. Curated Collections
Display meaningful collections in concentrated areas rather than scattered throughout your space. Whether vintage cameras, travel souvenirs, or art books, grouping related items creates intentional moments that feel curated rather than cluttered.
Consider rotating seasonal or themed displays rather than attempting to showcase everything at once. This approach keeps your space feeling fresh while allowing you to enjoy different pieces throughout the year.
41. Oversized Plants
Incorporate large-scale plants that make a statement without requiring the footprint of additional furniture. A tall fiddle leaf fig, graceful bird of paradise, or clustering bamboo adds organic texture and life while drawing the eye upward.
Position these natural sculptures in corners or areas that might otherwise feel empty but can’t accommodate furniture due to traffic flow needs. A single impressive plant creates more impact than multiple small ones while requiring less overall space.
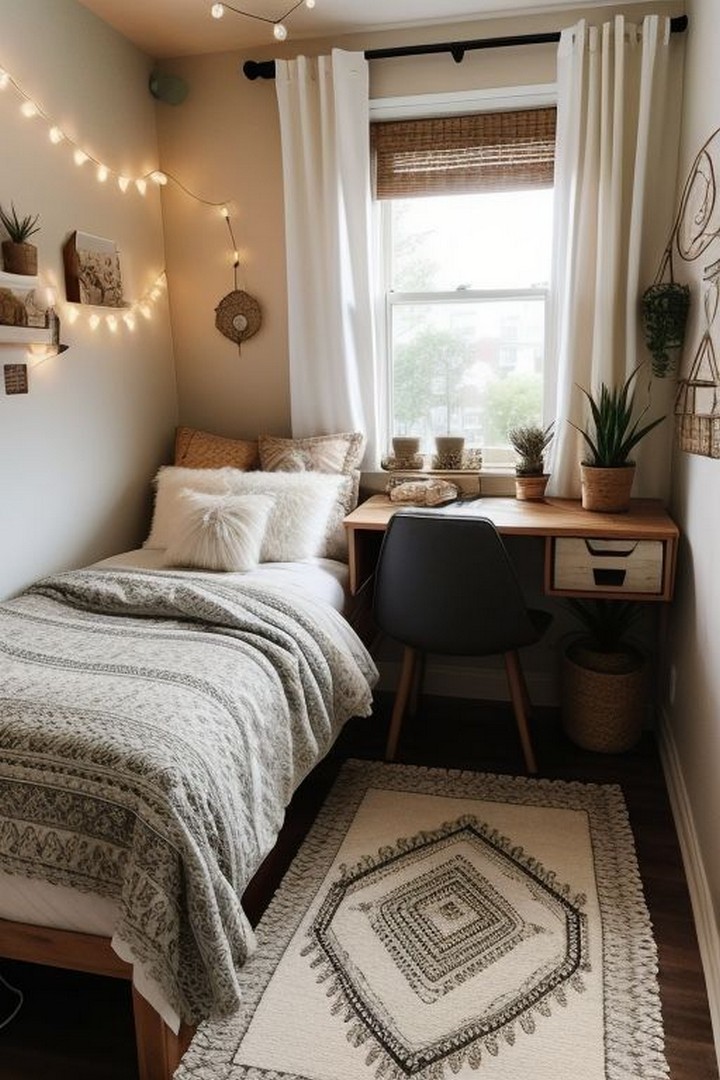
42. Textural Elements
Add dimension through varying textures rather than additional objects. A richly woven throw, nubby pillow covers, or a plush area rug creates visual and tactile interest without consuming physical space or contributing to clutter.
Layer complementary textures throughout your studio to create a sophisticated, multidimensional environment. This approach adds warmth and character while maintaining the clean lines essential in small-space design.
Living Beautifully in Your Studio
The beauty of studio apartment living lies in its inherent minimalism it encourages us to surround ourselves only with things we truly need or love. When implemented thoughtfully, the ideas in this guide create spaces that feel not just adequate but abundant, proving that square footage is just one measure of a home’s capacity to nurture and inspire.
Your studio can be a sophisticated reflection of your personal style rather than a temporary compromise. By selecting furnishings and decor that serve multiple functions, utilizing vertical space creatively, and applying visual techniques that enhance spaciousness, you’ll create a home that feels expansive beyond its physical dimensions.
Most importantly, remember that studios offer unique benefits beyond just affordable rent—lower maintenance requirements, enforced mindfulness about consumption, and the satisfaction of creative problem-solving. Embrace these advantages as you transform your compact space into a stylish sanctuary that works perfectly for your lifestyle.
Studio Transformation Journey
We’d love to see how you’ve implemented these ideas in your own studio apartment! Share your before-and-after photos or your favorite small-space solutions in the comments below. Which of these 42 ideas resonated most with your space challenges?
For more small-space inspiration, explore our related articles on minimal storage solutions, color psychology for compact homes, and budget-friendly studio transformations. Subscribe to our newsletter for regular updates on innovative small-space design ideas delivered directly to your inbox.
Remember, beautiful living isn’t measured in square footage—it’s created through thoughtful design choices that perfectly suit your unique needs and style. Your studio journey is just beginning!