
Painting rocks for Christmas is a fun and creative DIY project that you can enjoy with family and friends. These festive painted rocks can be used as decorations, paperweights, or even as small gifts. Here’s a step-by-step guide to creating Christmas-themed painted rocks:
Materials You’ll Need

1. Smooth, clean rocks or stones
2. Acrylic paint in various colors (red, green, white, gold, silver, etc.)
3. Paintbrushes of different sizes
4. Paint palettes or disposable plates for mixing colors
5. Water for cleaning brushes
6. Paper towels or a cloth for wiping brushes
7. Pencil or chalk for sketching designs (optional)
8. Clear acrylic sealer spray (optional, for added protection)
Step-by-Step Instructions
1. Select and Clean Your Rocks
- Choose rocks or stones that are smooth and have a flat surface for painting. You can find these in your garden or purchase them from a craft store.
- Clean the rocks thoroughly to remove any dirt or debris. You can wash them with soap and water and let them dry completely before painting.
2. Plan Your Designs

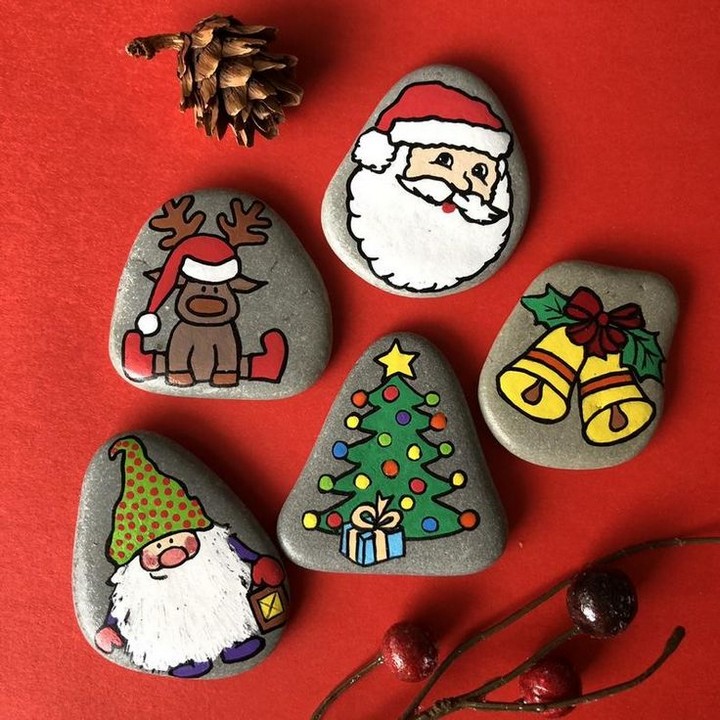
- Think about the Christmas-themed designs you want to create. Popular ideas include Santa Claus, snowmen, Christmas trees, ornaments, snowflakes, reindeer, and holiday messages like “Joy” or “Noel.”
- You can sketch your design lightly on the rock using a pencil or chalk if you prefer, or you can paint freehand for a more spontaneous look.
3. Paint the Base Coat

Start by applying a base coat of paint to the entire rock. This will serve as the background for your design. Common base colors are white, green, or red. Allow the base coat to dry completely before proceeding.
4. Add Details

- Use smaller paintbrushes to add details to your Christmas designs. For example, you can paint Santa’s hat and suit, add facial features, or decorate a Christmas tree with ornaments.
- Experiment with different colors and techniques to make your designs stand out. For instance, you can use a fine brush for intricate details or a sponge to create textured effects like snow.
5. Let It Dry

Allow each layer of paint to dry before adding additional details or colors. This will help prevent smudging or blending of colors.
6. Seal Your Rocks (Optional)

If you plan to display your painted rocks outdoors or want extra protection, you can seal them with a clear acrylic sealer spray. Follow the manufacturer’s instructions for application and drying times.
7. Add Finishing Touches

Once your rocks are completely dry and sealed (if desired), you can add any finishing touches like glitter, rhinestones, or ribbon for added flair.
8. Display or Gift

Arrange your Christmas-painted rocks in a festive display or use them as unique Christmas gifts for friends and family. You can place them in a decorative bowl, scatter them on a mantel, or hide them around your garden for a Christmas rock hunt.
Remember that painting rocks is a creative and customizable activity, so feel free to experiment with different designs, colors, and techniques to make your Christmas rocks uniquely yours. Have fun and let your imagination run wild!


